
Ever wonder how a whetstone actually sharpens your knives? It’s not cutting but abrading—wearing down the steel to create an ultra-sharp edge.
By understanding the science behind this process, you can better master your sharpening skills and get that perfect, razor-like blade.
Keep reading to learn how whetstones work step by step.
How a Whetstone Removes Metal to Form a Sharp Edge
A whetstone sharpens your blade through controlled abrasive wear. Hard particles embedded in the stone scrape tiny bits of steel from the blade’s bevel, gradually thinning it to a fine apex. This process relies on abrasion, not cutting, so each pass effectively grinds away microscopic damage and reshapes the edge. For those looking to start, a quality kit like Top Knife Sets With Blocks can provide a durable foundation for maintaining your tools. Premium Japanese knives require a consistent sharpening technique to preserve their high hardness and performance. Proper storage is equally important, as protective edge guards prevent accidental damage between sharpening sessions.
As the stone wears down, it exposes fresh abrasive surface areas, maintaining consistent sharpening performance. Each pass creates a burr—a thin wire of displaced steel—that indicates the edge has been reached. Removing this burr with additional strokes or honing ensures a clean, sharp finish.
Using a whetstone doesn’t straighten an existing edge but instead builds a new one from scratch. It’s a matter of controlled material removal, which results in a keener, more precise edge over time. By actively grinding away the steel, the stone restores the blade’s ability to cut smoothly and efficiently.

Premium Quality Sharpening Stone Materials: Quality White Corundum, 400/1000 and 3000/8000 knife sharpening stones suitable for most grinding operations, 4 types of grit work well with expensive or budget-friendly stainless steel kitchen knives

【Complete Knife Sharpening Stone Kit】You don't need to be a Pro to sharpen your blades, all you need is the right tools & technique. All the sharpening tools you need are here, one affordable set for you: 400/1000 & 3000/8000 grit whetstone; Coarse flattening stone; Non-Slip Bamboo base; Knife sharpening angle guide; Leather strop, a simple instruction manual about how to use and what does every component do.

WHETSTONE KNIFE SHARPENER — NO SKILL, NO GUESSWORK Most people avoid whetstones because holding the correct angle is intimidating. The included angle guide locks your blade position automatically — making professional knife sharpening practically idiot-proof, even on your first try. No oil needed, no mess, no guesswork.
How Whetstone Grit Size Controls Sharpening Speed and Finish
Whetstone grit size directly influences both how quickly the blade material is removed and the quality of the finish it produces. Lower grit numbers, such as 100 or below, have larger abrasive particles that cut rapidly, making them ideal for reshaping damaged or severely dulled edges. However, they tend to leave visible scratches and a rough surface. For most home cooks, a realistic maintenance schedule suggests sharpening at the first sign of dullness, as waiting too long makes the edge more difficult to restore, requiring a coarser grit to repair the damage. Mid-range grits, around 400 to 1000, strike a balance by removing metal reasonably fast while delivering a smoother finish; they are best suited for establishing a functional edge without excessive roughness. Higher grits, starting from 3000 and up, feature very fine abrasive particles that cut slowly but produce a polished, refined surface. The broader the grit size, the rougher and faster the cutting; finer grits offer a smoother, more polished edge but require more time to work through material. Your choice depends on whether you need quick material removal or a fine, polished finish. For maintaining that polished edge, applying a protective layer of food safe mineral oil can help preserve the blade’s condition between sharpening sessions. For those seeking a reliable everyday blade, choosing affordable Japanese knives ensures you can achieve and maintain a sharp edge without breaking the bank.
Why You Need Water or Oil (and What It Does to the Sharpening Process)
Using water or oil as a lubricant during sharpening is essential because it reduces friction, allowing for smoother, more controlled strokes. This lubrication helps carry away metal swarf, preventing the sharpening stone from clogging and ensuring consistent cutting performance. The fluid also suspends tiny metal particles, which exposes fresh abrasive surfaces and speeds up the sharpening process. However, unlike ceramic stones, which are typically used dry, the choice of lubricant becomes critical because diamond stones are often designed to work with water or even without any fluid, depending on the bond. It’s important to match the lubricant to your stone type. Water is suitable for waterstones; it creates a slurry that enhances cutting speed and produces a finer edge. Oil, on the other hand, works with oil stones primarily by lubricating and cooling the surface. Applying the wrong fluid—such as oil on a waterstone—clogs the pores and damages the stone, shortening its lifespan. Conversely, water on an oil stone won’t provide proper lubrication. The premium cost of a charcuterie board often reflects similar material and design considerations that prioritize durability and performance. For carving knives, achieving a keen edge requires both the correct stone grit and this precise lubricant technique.
Always use the recommended fluid for your specific stone type. This practice protects the stone’s structure, maintains optimal cutting speed, and prevents overheating, which could damage your blade’s edge. Proper lubrication is a simple but vital step for efficient, safe, and long-lasting sharpening.

Protect your investment in quality knives with this 4000 grit knife sharpening stone, great for maintaining and refining razor sharp cutting edges

【Grit 1000/3000 For Generic Sharpening Tasks】Made from high quality white corundum stone, this whetstone plays an essential and helpful role in your daily kitchen knives sharpening. Grit 1000: General purpose of sharpening dull knives; Grit 3000: Fine sharpening and deburring.

ALL NATURAL SHARPENING LUBRICANT – Gatco 11061 Honing Oil is formulated as an all natural sharpening lubricant designed specifically for use with sharpening stones. It helps maintain stone performance during knife and tool sharpening while supporting consistent lubrication with only a few drops required per use. The 6 oz (180ml) bottle provides ample solution for repeated sharpening sessions.
How to Progress Through Coarse, Medium, and Fine Whetstone Grits
To progress through coarse, medium, and fine whetstone grits, you start with the appropriate grit based on your blade’s condition. Begin with a coarse stone, typically between 150 and 600 grit, for blades that are damaged or chipped. This grit aggressively removes metal to reshape the edge quickly. Once the main shape is set, switch to a medium grit stone, usually between 600 and 2000 grit, to refine the edge and smooth out the scratches from the coarse stage. This step is crucial for routine sharpening and preparing the blade for finer polishing. For hosting a sharpening party, a durable charcuterie board makes a practical surface to hold tools and stones.
Finally, move to a fine grit stone, generally 3000 grit or higher, to polish the edge and improve retention. While optional for simple sharpening tasks, using a fine stone enhances cutting performance and prolongs the sharpness of the edge. Always ensure you do not skip grits; jumping more than two grit levels can leave deep scratches that are difficult to remove later. Match each stage to the blade’s condition, focusing on removing only the necessary metal. Complete each stage fully—ensuring all scratches from the previous grit are eliminated—before advancing to the next grit. For a final touch that refines the edge beyond the finest stone, many sharpening enthusiasts apply a stropping compound to a leather strop. For high-performance blades, such as Japanese folding knives, using a fine whetstone can significantly enhance their cutting ability and edge longevity.
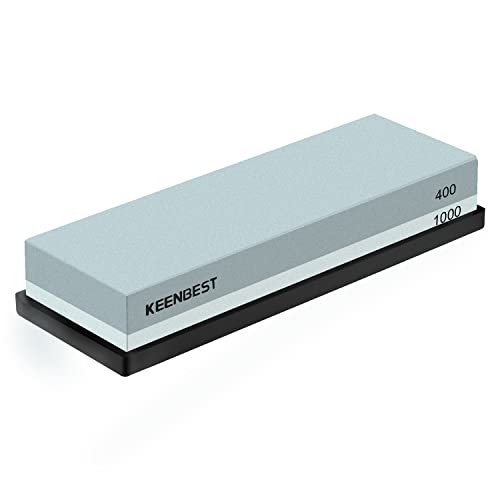
No oil needed, just put the stone into water for 10-15 minutes before using and they are ready to use. You can always adding water on it while sharpening, with water the lubricating effect of grinding will be great and helps you to save strength
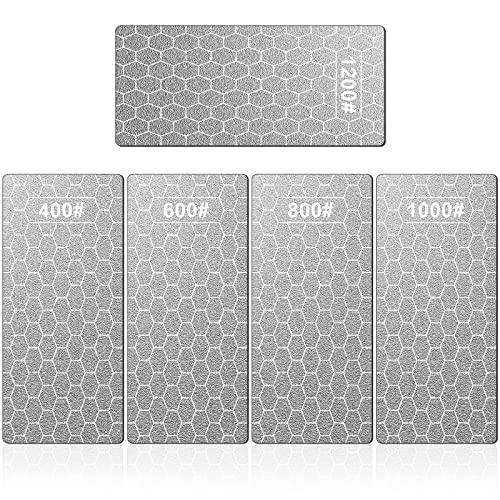
Unique Honeycomb Design:The sharpening stone set with unique honeycomb design ensures that the dust generated during the grinding process will not affect the sharpening. The diamond sharpening stone has a non-slip base to ensure that it will not slip during use and easily tackle both coarse and fine sharpening jobs.

▶【PREMIUM WHETSTONE FLATTENER KIT】Our whetstone leveler set comes with one coarse lapping stone and one fine wet stone fixer, they can remove waste material while flattening any type of sharpening stones, Oil Stones or Ceramic Stones.
How to Detect a Burr and Know When Your Whetstone Edge Is Done
To detect that your whetstone edge is done, look for the formation of a burr—a tiny lip of displaced steel that appears on the side opposite the bevels once they have met. This burr indicates the apex of the edge has been reached. Gently run your thumb perpendicular to the edge; if you feel a small hook or rough ridge, a burr has formed. Touch is more reliable than sight for detecting burrs, especially small ones. Ensure the burr runs the full length of the blade from heel to tip; if it’s patchy or inconsistent, keep sharpening until it’s uniform. Using a sharpening steel can help refine the edge after the burr is removed, but for now focus on achieving a consistent burr. Once the burr is consistent along the entire edge, your bevel has met, and the edge is stable enough for the next step. Consider that just as stylish book-shaped wood cutting boards require careful selection based on quality and performance, detecting a consistent burr ensures your sharpening is complete before moving on. Remember, the burr is temporary—you’ll remove it later to create a clean, sharp edge. Paying attention to these details mirrors the process of evaluating cutlery sets for quality and value to ensure a worthwhile result.
