If your kitchen knives are starting to show signs of rust, you’re probably wondering how to get them looking like new again.
Light rust can often be removed with simple household items, but deeper corrosion might need a little extra effort.
Whatever the level of rust, you’ll learn effective methods to restore your knives and keep them in great shape.
Everything you need to know is right below.
Why Rust Forms on Kitchen Knives (and How to Remove It Fast)
Rust forms on your kitchen knife when its protective surface gets damaged, exposing iron to moisture and oxygen. This creates iron oxide, commonly known as rust. Even stainless steel blades aren’t immune; if the chromium-oxide barrier gets scratched or chipped, rust can develop. Initially, rust appears as tiny specks, not full coverage. Factors that accelerate rust formation include leaving your knife wet, storing it in humid environments, or running it through the dishwasher. Salt, acidic foods, and hard water also speed up the process. To prevent rust, keep your knife dry, reapply protective coatings when needed, and avoid exposing it to moisture and corrosive elements. Using quality knife sets with blocks can help reduce moisture exposure through proper storage. A well-selected cutlery set often includes blades with higher chromium content, which provides a more durable protective layer against rust. If rust becomes severe or the blade is beyond repair, you may need to explore safe ways to dispose of the knife.
Gather Soft Scrubbing Tools and Your Rust Remover
Gather soft scrubbing tools and your rust remover. Use items like a cloth, sponge, toothbrush, or non-abrasive pad to clean the blade without scratching the finish. Avoid steel wool because it can leave scratches on polished surfaces. For your rust remover, mix baking soda with a small amount of water to create a paste that clings to rust spots and loosens rust gently. Alternatively, you can submerge the affected area in distilled white vinegar for a short soak, but only apply the vinegar to the rusty spots. Japanese knife enthusiasts often recommend starting with a top affordable option to practice maintenance techniques. For a more even finish, you can also use long strokes in one direction to minimize surface scratches. When selecting a dedicated solution, consider a knife sharpening system that includes rust removal capabilities for consistent blade upkeep. Maintaining a sharp edge with a high-quality sharpening stone also helps prevent uneven wear that can trap moisture.
Apply your chosen remover directly to the rusted areas, not the entire blade. Use light pressure and work along the grain of the blade for the best results. After scrubbing, wash the blade with warm, soapy water and dry it immediately with a lint-free cloth to prevent further rust formation. Finishing with a coat of food-safe mineral oil helps protect the surface and keep rust at bay over the long term.

【Premium 10-Piece Multi-Grit Variety Pack】 This comprehensive kit includes 2 scuff pads in 5 distinct colors and types: Maroon (General Purpose, 320 grit), Gold (150 grit), Purple (600 grit), Gray (800 grit), and White (Finishing). This collection of scuffing pads provides a complete range from coarse preparation to ultra-fine finishing, offering a superior, reusable solution for all stages of surface work including scouring on various materials.
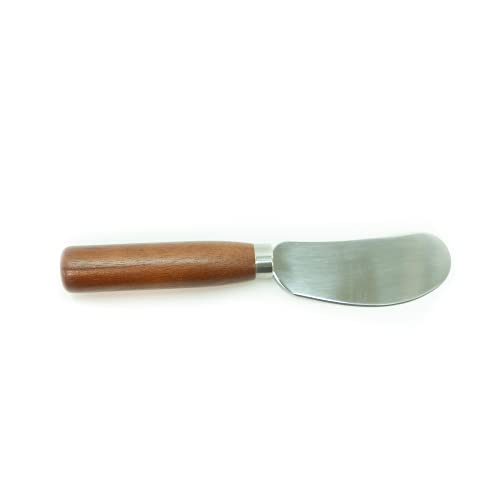

Clean sharp blades safely
Check Rust Depth: Light Surface vs. Heavy Pitting
To determine rust depth, start by examining the appearance. Light surface rust appears as a thin, orange layer with a smooth texture. Heavy pitting displays dark brown or black spots and feels uneven when you run your finger over it. Similar to how charcuterie board costs reflect material quality and craftsmanship, the extent of rust damage dictates the complexity and expense of knife restoration. After removing rust, using a ceramic sharpening stone can help restore a precise edge on the blade. For the best results, consider using top ceramic knife sharpeners designed specifically for these hard blades.
Use touch to further assess the damage. Surface rust feels rough but generally flat, indicating the metal beneath is still intact. Heavy pitting feels uneven and craters form as the metal is eaten away. Visible pits or craters confirm that the steel has been significantly compromised, not just covered in oxidation. Be alert for dark spots with rough textures, as they suggest corrosion has penetrated beyond superficial rust. If the rust under your finger feels uneven or rough, you are dealing with more than surface-level oxidation, which means deeper damage that may require more intensive repair or replacement. Recognizing rust depth is key to choosing the appropriate removal and restoration methods for your knife.
Remove Light Rust From Kitchen Knives With a Baking Soda Paste
To remove light rust from your kitchen knives, create a paste by mixing baking soda with a small amount of water until it has a thick, toothpaste-like consistency. Apply this paste directly onto the rust spots. Let it sit for 15 to 20 minutes, or up to an hour for more stubborn rust. Using a soft-bristled toothbrush or a cloth, scrub gently in circular motions to lift the rust without damaging the blade’s polished surface. Reapply fresh paste if rust traces remain after scrubbing. This method preserves your knives’ appearance by avoiding harsh abrasives and helps prevent rust from spreading if treated promptly. Routine blade care is key to maintaining both performance and longevity, especially since many affordable knives use high-carbon steel that requires more frequent maintenance than stainless options. For those seeking the most durable blades, choosing a top-rated utility knife can reduce the need for frequent rust removal. Repeat the process if needed to ensure all rust is removed, keeping your knives clean and sharp without scratches. For beginners, selecting the best wood carving sets can also help build confidence in blade maintenance techniques.

A HOUSEHOLD CLASSIC: This bulk 7 lb resealable bag of ARM & HAMMER Baking Soda unlocks 100+ uses across your home—from kitchens and laundry rooms to crafting tables and beyond

A HOUSEHOLD CLASSIC: Pack of 12 x 1 lb boxes of ARM & HAMMER Baking Soda unlocks 100+ uses across your home—from kitchens and laundry rooms to crafting tables and beyond

100% Sodium Bicarbonate / It's just pure sodium bicarbonate with no additives and no fillers. Combine with citric acid to make your own fizzy bath bombs.
Wash and Dry the Blade Immediately After Each Method
Immediately after each rust-removal method, rinse the blade thoroughly with warm, clean water to wash away all paste, acid, soap, and loose rust particles. Pay close attention to the edge, spine, and bolster, ensuring no residue remains. If needed, use a drop of mild dish soap along with a soft sponge to gently clean those areas. Keep washing brief to minimize moisture exposure.
Dry the blade immediately with a clean towel or cloth. Do not let it air dry, as lingering moisture can cause flash rust. Wipe both sides thoroughly, including the edge and handle junction. Check for water hiding in the bolster, handle seam, or tang—hold the blade at an angle to spot any droplets. Repeat the drying process until the blade is completely dry.
This step is crucial for effective knife maintenance and rust prevention. Never store a damp blade. Once fully dry, place the knife in a dry location to prevent rust from returning.
Soak Stubborn Rust in Vinegar for Heavier Spots
Stubborn rust can often be loosened by soaking the affected blade in white vinegar. Submerge only the rusted section of the blade in a tall container, ensuring handles made of wood, micarta, or G10 stay dry to prevent swelling. The soaking duration depends on the severity of the corrosion: 30 minutes for light rust, up to several hours for heavier spots, but never exceeding 24 hours to avoid blade etching and dulling from prolonged acid exposure. Check the rust’s progress every hour to prevent over-immersion. After soaking, use a soft toothbrush to scrub off loosened rust, then rinse thoroughly with soapy water to eliminate vinegar residue. Dry the blade immediately with a lint-free cloth to prevent residual acid from causing further rust. Unlike ceramic blades, which require a dedicated sharpening stone to restore a keen edge, these methods focus on rust removal. If rust remains, repeat the soaking process instead of extending it beyond the recommended maximum.

VERSATILE PANTRY STAPLE: Perfect for cooking, pickling, marinating, and enhancing your favorite recipes with a crisp, tangy flavor.

TOUGHER THAN THE TOUGHEST RUST: Easy to use spray gel that clings to iron, steel and other metals to remove rust fast

TACKLES TOUGH STAINS: One 22 oz spray bottle with a convenient trigger helps tackle calcium, lime, and rust deposits for families and homeowners targeting home, bathroom and kitchen cleaning
Try Lemon, Salt, or a Potato for Mild Surface Rust
For mild surface rust, lemon, salt, or a potato are effective natural remedies. Begin by washing your knife thoroughly to remove any dirt or grease. Sprinkle coarse salt directly onto the rust spots to act as a gentle abrasive that helps lift the oxidation. Then, cut a lemon in half and rub the juice onto the affected area, letting it sit for 2 to 3 minutes. The mild acidity of lemon helps loosen rust without damaging the blade’s finish. Use the lemon rind or a soft cloth to scrub the rust in circular motions. Afterward, rinse the knife with water and dry it immediately to prevent further corrosion. Alternatively, press a cut potato against the rust; the oxalic acid in potatoes can tackle early surface stains. For added cleaning power, combine the potato with salt. This method of using lemon and salt is an environmentally friendly cleaning method that avoids harsh chemicals. Always dry your knife thoroughly after cleaning and apply a light coat of oil to protect against future rust formation. For a more durable option, however, anglers often choose rust-resistant stainless steel fillet knives that require less frequent maintenance. Many top-rated electric fillet knives also incorporate stainless steel blades that resist corrosion during frequent use.

FOR THE KNIFE THAT'S BEEN SITTING IN THE BACK OF THE DRAWER TOO LONG: One pass of the eraser on a rust spot, a little water, thirty seconds of circular motion — surface rust, staining, and oxidation lift off without scratching the blade. Works on German steel, Japanese steel, stainless, and carbon — the same block of knives you've been meaning to clean for months, done in one session.

EVAPO-RUST RUST REMOVER: Evapo-Rust effortlessly removes rust from automotive parts, hardware, tools, cookware, and antiques without any scrubbing or sanding.
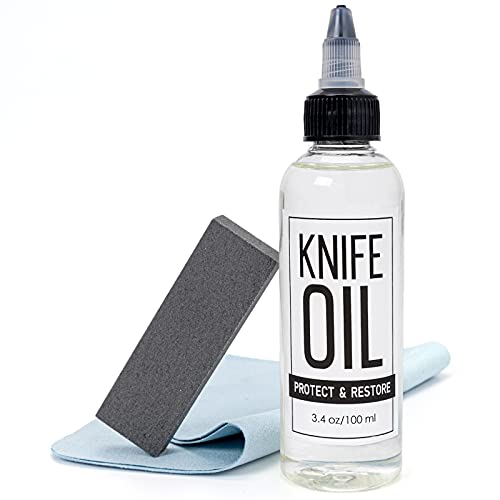
Professional Maintenance Oil: Specifically designed to maintain steel and carbon steel kitchen knives from rust and wear. Our blade oil works wonders on any type of blade, providing superior protection for your knife blades. A perfect kitchen knife oil for kitchen knives and a perfect knife oil lubricant for pocket knives, gardening equipment, and more.
Rust Removal Mistakes That Damage Your Blade
Using improper rust removal techniques can do more than harm good. Coarse steel wool can gouge your blade, creating grooves that trap moisture and promote future rusting. Aggressive rubbing dulls the edge and undermines the sharpening you’ve done. Soaking knives in vinegar for longer than eight hours can etch the steel and damage logos or markings. Harsh chemicals like bleach may stain, pit the metal, and leave residues that impair performance. Using a dedicated sharpening rod is essential after cleaning serrated knives to restore the edge without damaging the scalloped grind. After cleaning, it’s crucial to dry your knife immediately; air-drying allows moisture to linger and accelerates re-rusting, especially around the handle or spine. Water trapped near the handle base or handle screws worsens corrosion and complicates maintenance. Avoid using rotary abrasives unless you’re highly skilled, as they can remove too much metal and alter your blade’s geometry. Selecting a knife with a protective blade cover can help prevent future exposure to moisture and rust. Instead, stick to fine grit abrasives and gentle pressure to preserve your blade’s finish and sharpness. For safe storage, choosing a peeler with a well-designed handle can similarly reduce moisture traps and improve long-term durability.
Keep Rust Off Your Knives for Good
Regularly applying a thin coat of food-grade mineral oil after each wash is key to preventing rust. This creates a moisture barrier that stops oxidation, especially in humid environments. Make sure to use a clean, soft cloth to evenly distribute the oil over the entire blade, including the spine and handle area. Avoid using too much oil, as excess can attract dirt and residue. Unlike mineral oil, honing oil is typically made from petroleum distillates and may contain additives that are not food-safe, so it should never be used on kitchen knives.
Consistent storage methods also matter. Keep your knives in a dry block, on a magnetic strip, or in protective sheaths, and never leave them in damp environments. Adding a silica gel pack or desiccant to your storage can further reduce moisture exposure during long-term storage. These simple steps will significantly extend the life of your knives and keep rust at bay.

FOOD-GRADE MINERAL OIL FOR CUTTING BOARDS: Helps restore and protect dry cutting boards, butcher blocks, and wooden kitchen surfaces. Refreshes dull, worn wood and helps prevent cracking or splitting; works on bamboo, teak, acacia, olive wood, and hardwood boards

NSF CERTIFIED FOOD GRADE - This premium mineral oil is NSF certified and lab-tested to meet the strictest food safety standards. Colorless, odorless, tasteless, and gluten-free — perfect for cutting boards, butcher blocks, and all food-contact surfaces.

NSF CERTIFIED FOOD GRADE - This premium mineral oil is NSF certified and lab-tested to meet the strictest food safety standards. Colorless, odorless, tasteless, and gluten-free — perfect for cutting boards, butcher blocks, and all food-contact surfaces.
When to Call a Pro Instead of DIY
If your knife handle is cracked, swollen, or coming apart, it’s time to call a professional. These issues suggest moisture has penetrated internal parts, making DIY repairs unsafe. Deep pitting that resists scrubbing indicates significant blade weakening, as crumbling areas compromise its strength. Cracks extending into the tang or bolster, warping, or loss of temper mean the blade’s structural integrity is compromised and needs expert assessment. For valuable, antique, or collectible knives, professional restoration helps preserve their value and original details. Attempting to sand or refinish them yourself risks ruining the mirror polish or logo. Heavy rust that requires grinding can alter the blade’s alignment or thin the edge, reducing performance. If the knife feels brittle or if repairing it costs nearly as much as replacement, it’s best to stop and consult a restorer. A skilled professional can ensure safety and quality when uncertainty about the damage persists.