
Wondering how to craft a sturdy, beautiful epoxy cutting board from scratch? The process involves selecting the right hardwood and carefully pouring epoxy to create a smooth, durable surface.
With the right techniques, you can produce a customized piece that’s both functional and eye-catching. Keep reading to learn all the steps to make your own epoxy cutting board.
Which Hardwood Works Best With Epoxy?
Hard maple is the best hardwood for epoxy projects like cutting boards because of its density, stability, and fine closed grain. These qualities help resist shifting and bubbling during the curing process. Choosing the right hardwood affects your project’s durability and appearance. Closed-grain woods such as maple, walnut, or cherry prevent resin from pooling and reduce excess movement. Maple’s fine grain ensures a predictable and smooth curing, while walnut adds a durable, darker contrast. Cherry offers warmth and is friendly to knife edges. Avoid open-grain or soft woods because they tend to absorb resin, off-gas, and develop defects. For a stable, sanitary, and bubble-free epoxy pour, stick with dense hardwoods in the 900 to 1,500 Janka hardness range. Consider knife sets with blocks made from these hardwoods to ensure your cutting board resists blade marks and stays flat. The Janka hardness test is a reliable way to measure a wood’s resistance to denting and wear, helping you select the best species for your epoxy project. Bamboo, while popular, is not recommended because its high silica content can dull knives and it lacks the density of true hardwoods.
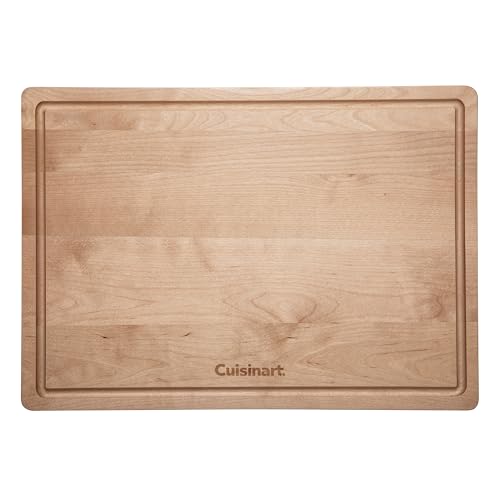
Convenient double-sided board superbly crafted from durable, beautiful maple wood
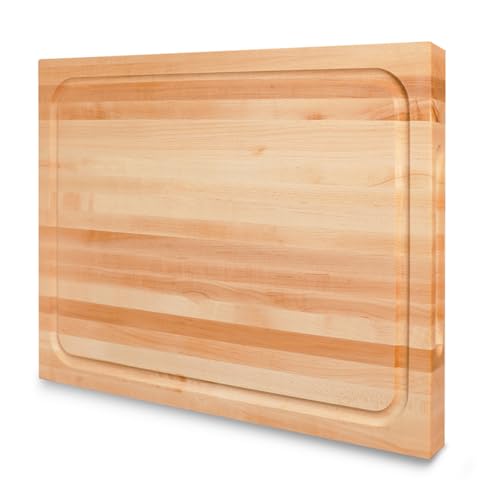
SOLID MAPLE WOOD: Smooth surface that's gentle on blades for frequent chopping. Light cream to tan with a tight, closed grain for a clean look that fits most kitchen styles.

Durable and Long-Lasting: This edge grain butcher block cutting board resists deep cuts, ensuring a sturdy surface that lasts through years of heavy kitchen use, perfect for meat, veggies, and daily prep.
Build a Leak-Proof Mold for Your Cutting Board
To ensure your mold is completely leak-proof, start with proper sealing techniques. First, clean all cavity surfaces with denatured alcohol and a lint-free cloth to remove dust and grease. Apply polypropylene sheathing tape as a release layer, overlapping each strip at every seam so no bare substrate remains exposed. Use separate tape strips on the base and walls to create a continuous barrier. This approach mirrors the precision craftsmanship required for ensuring a cutlery set offers reliable, long-term use.
Next, run a continuous bead of silicone sealant along every internal joint where the base meets the walls. Smooth the sealant into the seams, filling all gaps to prevent epoxy from leaking through. Reinforce the outside perimeter with hot glue, paying special attention at corners—these are common leak points. Before pouring, test the mold with water to check for leaks. Ensure all sealants fully cure before use for a reliable, leak-proof mold. For optimal results, the precision required in this process is comparable to the quality and performance found in top-tier Japanese kitchen knives. When selecting tools for this task, consider that top-rated utility knives offer superior edge retention for clean cuts and long-lasting sharpness.
Mix and Pour Epoxy for a Bubble-Free Finish
To achieve a bubble-free epoxy finish, start by warming your resin and hardener in a water bath. This lowers their viscosity, allowing trapped air to escape more easily during mixing. Pay close attention to the curing temperature—too cold traps bubbles, while excessive heat reduces your working time. Stir slowly with a flat-edged tool, folding the mixture instead of whipping it to prevent air incorporation. Avoid lifting the stirrer repeatedly, as this introduces extra bubbles. Scrape the sides and bottom thoroughly to eliminate uncured pockets of resin. If you’re adding resin additives, pre-mix them gently to avoid creating additional air bubbles. When pouring, do so slowly into one corner of the mold, letting the epoxy displace air naturally. After pouring, pass a heat gun lightly over the surface to pop any remaining bubbles, but avoid overheating the epoxy which can cause uneven curing or surface imperfections. For maintaining your tools, cleaning with a mild detergent after use prevents residue buildup and keeps surfaces hygienic. This technique, commonly used by a props maker in Perth, is a quick, cost-effective solution for achieving a smooth finish. Adopting a slower pour rate mimics the deliberate movements used when honing a blade with diamond sharpening stones, reducing turbulence and bubble formation. Selecting the right finishing tools, similar to how cheese knife picks vary by hardness and texture, ensures your epoxy surface remains scratch-resistant and polished.

▶ 【Strong Power With 2 Modes】 SEEKONE 1800W heat gun provides strong power quickly heat up to 1202℉(650℃) in 1.5 seconds. Two modes: I: 50-450℃, 190-210L/min; II: 50-650℃, 250-500L/min

Fast Heating Dual Temp Control: LET'S RESIN heat gun is equipped with a high power of 350W and 2 temp adjustment settings. The I-level is 482 ° F/250 ° C with a wind speed of 150L/min, and the II-level is 752 ° F/400 ° C with a wind speed of 350L/min. Reach your desired working temperature with our heat gun for crafts within seconds and work efficiently.

DRIES 5X QUICKER THAN HAIRDRYER - Whether you need a heat gun for detail work or for quick work on big projects, this heat gun for crafts won't disappoint you. With technology that allows it to heat up in seconds, the heat gun can instantly reach up to 200°C/390°F in temperature.
Cure and Flatten Your Epoxy Cutting Board
Once the epoxy has fully cured, which typically takes about seven days, you can begin flattening the board. Don’t rush this process—flattening too early can cause tearing or uneven surfaces because the epoxy isn’t yet firm enough to handle machining. Ensure the epoxy has reached a solid, non-gummy consistency before proceeding. Cooler temperatures can extend the curing time, so be patient and follow the manufacturer’s recommended schedule for best results. To avoid damaging the wood during later maintenance, note that olive oil is not safe for cutting boards because it can go rancid over time. Similarly, whetstone lifespan depends on proper care and avoiding oils that degrade performance. For an effective protective finish, you should apply a food-safe mineral oil that will not spoil.
To flatten the board, use a router sled. First, set the depth by identifying the highest point of the surface. Take light passes, removing only about 1/16 inch of material per pass, and overlap each pass by roughly 50 percent. This reduces ridges and ensures an even surface. Multiple shallow passes help prevent chip-out and heat buildup, which can damage the epoxy or wood. Securing the slab with double-sided tape or clamps prevents movement during operation and promotes consistent pressure.
A sharp carbide cutter is essential to prevent melting or gouging the surface. Always employ dust collection and wear respiratory protection to keep your workspace safe. After flattening, inspect the surface carefully for any high spots and sand or re-machine as needed before moving on to sand and sealing.

NSF CERTIFIED FOOD GRADE - This premium mineral oil is NSF certified and lab-tested to meet the strictest food safety standards. Colorless, odorless, tasteless, and gluten-free — perfect for cutting boards, butcher blocks, and all food-contact surfaces.

FOOD GRADE QUALITY: Premium mineral oil designed for direct and indirect food contact, meeting U.S. FDA regulations and USP standards for maximum safety

NSF CERTIFIED FOOD GRADE - This premium mineral oil is NSF certified and lab-tested to meet the strictest food safety standards. Colorless, odorless, tasteless, and gluten-free — perfect for cutting boards, butcher blocks, and all food-contact surfaces.
Sand and Seal for a Food-Safe Surface
After flattening and thoroughly cleaning your board, you’re ready to sand and seal the surface to make it food-safe. Begin sanding with a medium grit sanding sponge or paper, then progress to finer grits like 220 or higher for a smooth finish. It’s important to sand evenly across the epoxy and wood, avoiding excessive thinning of the epoxy layer which can compromise its durability. Once sanding is complete, remove all dust completely with a tack cloth or a damp cloth to ensure a clean surface. While sanding, remember that proper care prevents the growth of bacteria in the wood grain.
For sealing, use only 100% pure food-grade mineral oil. Apply it generously with a clean cloth, letting it soak into the wood and epoxy. Wipe away any excess after a few minutes. Lightly sanding the oiled surface with fine grit (around 320) can help achieve a non-slip finish and ensure the oil penetrates evenly. Reapply mineral oil periodically, as this finish can wear over time with use, especially in areas exposed to moisture or frequent contact. For the best results, consider using a high-quality food-grade mineral oil that is reviewed for deep penetration and durability. Understanding the mechanism of a cherry pitter can help you appreciate how simple tools make tedious tasks like fruit prep much faster.
When selecting epoxy, confirm it is FDA-compliant for food contact. You can choose from a variety of color additives to match your style before sealing, but always verify that the epoxy is rated for food-safe applications. Keep in mind cured epoxy is not knife-proof—cutting directly on it can damage the surface and create unsafe areas. Always check the product’s label for explicit food-contact language and full cure times, which can range from several days to a month depending on the epoxy. Proper sealing and maintenance will provide a durable, incidental-contact surface suited for food prep but not for cutting tasks.
Fix Bubbles, Leaks, and Uneven Cures
To fix bubbles, leaks, or uneven cures during your epoxy pour, follow these targeted steps. For bubbles, prevent them by pouring slowly, using a heat gun on low heat, and sweeping quickly across the surface—avoid lingering, which can scorch the wood. Stubborn edge bubbles can be popped with a toothpick. To address leaks, ensure the mold is tightly dammed and seal the substrate beforehand. Small gaps can be patched with a thin seal coat; wait for it to set before proceeding. Uneven curing often results from cold pours or improper mixing; stabilize your workspace temperature and measure epoxy components accurately. After curing, sand down any surface defects to remove epoxy contamination before reapplying a coat. Deep pockets require heavy sanding first to smooth out irregularities. During repairs, keep dust levels low to prevent introducing new flaws. Note that a regular mineral oil soak can prevent wood cutting boards from drying out and developing cracks that epoxy repairs would later need to fill. This approach ensures the board’s surface remains safe and functional, similar to how a butter knife’s notch prevents the blade from sticking flat to soft spreads. Understanding the design logic behind premium boards can also inform your DIY choices for better durability and aesthetics.
