Wondering how to sharpen your knives effectively? It all starts with choosing the right stone and technique.
With a basic water stone and a steady hand, you can turn dull blades back into razor-sharp tools. Stay with me, and I’ll guide you through each step to get your knives slicing smoothly again.
Which Sharpening Stone Should You Choose?
Your choice of sharpening stone depends on your needs and how often you sharpen. Water stones cut quickly but tend to wear out faster, requiring regular flattening and replacement. This makes them ideal if you sharpen frequently and want fast results, but they need more maintenance. Oil stones are more durable and last for decades without dishing, making them a good choice for long-term use, although they cut more slowly and require more passes to sharpen the blade. For those seeking the best value, a balanced option can be found in premium cutlery sets that combine quality performance with long-term durability. Diamond stones stay flat longer, remove metal aggressively, and are best if you have high sharpening frequency or need to repair damage quickly. For beginners, a synthetic water stone around 1000 grit offers a balanced combination of speed and affordability. If you prefer less maintenance and are willing to sharpen more slowly, diamond plates can be advantageous. For very hard or high carbide steels like CPM M4, diamond stones are recommended because softer stones are less effective against carbides. Choose based on your tools and how often you plan to sharpen. Beginners should also watch for common beginner mistakes like inconsistent angle or over-honing, which can slow progress and damage the blade. For those prioritizing high-quality Japanese knives, a well-matched stone can help maintain their precise edge geometry and fine blade steel.

Convenience & Durability:Diamond sharpening plates are far more durable and easily to maintain than whetstones because they won't be cratered and do not need to be flattened
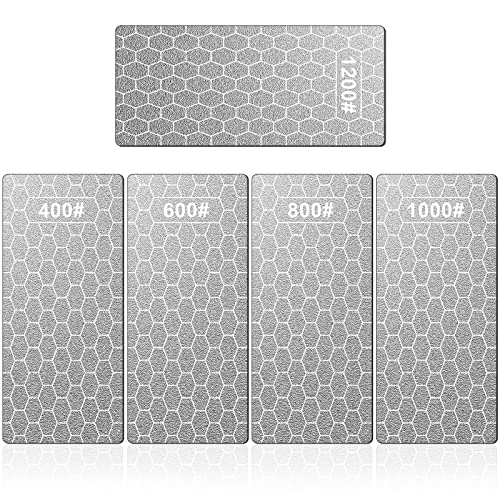
Unique Honeycomb Design:The sharpening stone set with unique honeycomb design ensures that the dust generated during the grinding process will not affect the sharpening. The diamond sharpening stone has a non-slip base to ensure that it will not slip during use and easily tackle both coarse and fine sharpening jobs.

FAST, Durable and Heavy-Duty: Industrial monocrystalline diamonds are electroplated onto a stainless steel base of 0.35 inch thickness. Up to 5 times faster sharpening than oil stone, water stone
Set Up Your Sharpening Stone for Stability
Set up your sharpening stone on a stable base is essential to prevent wobbling or shifting during use. Use a flat, level surface such as a countertop or workbench. For extra grip, place a non-slip silicone or rubber mat underneath the stone. Your stone holder’s aesthetic design shouldn’t distract from its main function: gripping the stone securely. A damp towel can serve as a quick anti-slip layer, but a dedicated holder with end-stops offers better control and stability. When selecting a holder, remember that overall knife quality depends just as much on the sharpening tools you choose as on the blades themselves. Check tool compatibility to ensure the holder fits your stone size snugly and doesn’t slide side to side. Make sure the stone sits completely on the base with no overhang to avoid accidental slips. Work on a clean, clutter-free surface and keep water nearby to maintain a wet sharpening surface. A secure setup minimizes accidents; a moving stone can cause your knife to slip and lead to injury or damage. Avoid cheap holders that flex or wobble, as they compromise stability and can ruin your edge. Just as premium board materials justify their cost through durability and function, investing in a rigid holder is a costly but worthwhile upgrade for consistent results.
Find the Right Sharpening Angle (and Keep It Consistent)
Estimate the sharpening angle by setting the blade flat and then raising the spine slightly—about the thickness of a dime for roughly 20 degrees. Use a marker on the bevel to monitor bevel consistency: if the ink wipes off only at the edge, you’re too low; if it remains near the top, you’re too high. The goal is to achieve even wear across the entire bevel. Start with a precise target angle, then regularly check it to maintain consistency—speed matters less than keeping the angle steady. For knives designed to excel at specific tasks like spreading, consistent edge control is equally critical for performance. Just as with cutting boards, over-oiling a stone can lead to residue buildup that impedes performance. Extending the life of your equipment also involves protecting it from excess moisture, which can damage both wood and sharpening stones.
Master the Proper Stroke Technique on Your Stone
Once the angle is locked in, focus on controlling your blade’s movement across the stone. Maintain a steady, consistent stroke from heel to tip in one smooth, sweeping arc. Keep the edge in continuous contact with the stone throughout each stroke, finishing at the tip to prevent a dull point. Apply moderate, even pressure—lighter on finer stones to refine the edge without causing deep scratches. Decide whether to use edge-leading or edge-trailing strokes and stick with that direction throughout the process. Don’t rush; slow, rhythmic repetitions help build control. Avoid lifting the tip early or changing the pressure mid-stroke, as these habits can lead to uneven abrasion. Alternating strokes from each side with equal counts keeps the bevel centered. For beginners, aiming for 5 to 15 strokes per side is a good rule of thumb to develop consistent technique. Balancing flavor and nutrition is key when considering charcuterie board health, as the variety of meats and cheeses can offer protein but also high sodium. A well-aged cheese board similarly relies on balanced, even distribution to elevate the final presentation. Selecting the right stone for your kitchen depends on its grit type and intended use, as detailed in sharpening guides.
Check for a Burr Before Switching Grits
To confirm a burr has formed before switching to a finer grit, look for a small, rough ridge along the entire edge. This burr indicates the bevel has reached the apex, meaning enough steel has been removed from the edge. To check, gently run your finger perpendicular from the spine to the edge, feeling for the tiny ridge on the opposite side you just sharpened. Be sure to examine the heel, midsection, and tip—don’t rely on a single spot. A partial burr suggests your angle isn’t consistent across the edge, so you need to make additional strokes on this grit. Once you feel a uniform burr along the entire length, coarse sharpening is complete. Avoid confusing the grind line with a burr, and don’t press too hard during this check. Only proceed to a finer grit once the burr is fully formed and consistent across the entire edge. A high-quality blade will also benefit from a storage box to protect its edge after sharpening. For a non-toxic and safe cutting surface, consider using a bamboo cutting board to pair with your newly sharpened knife. For skinning tasks, a blade with a fine cutting edge makes processing the hide much easier.
When to Move to a Finer Grit on Your Sharpening Stone
You should only move to a finer grit once the entire edge has a uniform, fully formed shape. The reason for switching to a finer stone isn’t to reduce the number of strokes but to erase the scratches left by the previous grit. If only part of the edge has a burr or roughness, stick with your current grit; a finer stone won’t fix incomplete shaping. For routine sharpening, starting at around 1000 grit works well. If your blade is damaged or heavily dulled, begin with a coarser grit to reshape the edge. The key rule is to wait until the entire edge is smooth, symmetrical, and burr-free before progressing to a finer stone. Finer abrasives will then refine the edge without altering its basic shape—they won’t rebuild it. Top Japanese sharpening stones are prized for their consistent abrasive quality and ability to deliver a refined finish across these grit transitions. Understanding this process is similar to selecting the right grit when assembling a charcuterie board.

【Complete Knife Sharpening Stone Kit】You don't need to be a Pro to sharpen your blades, all you need is the right tools & technique. All the sharpening tools you need are here, one affordable set for you: 400/1000 & 3000/8000 grit whetstone; Coarse flattening stone; Non-Slip Bamboo base; Knife sharpening angle guide; Leather strop, a simple instruction manual about how to use and what does every component do.
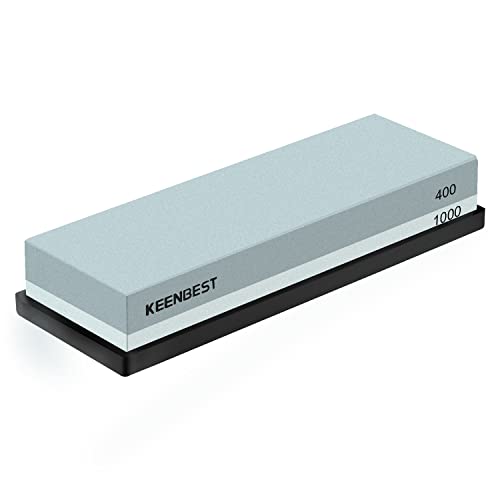
No oil needed, just put the stone into water for 10-15 minutes before using and they are ready to use. You can always adding water on it while sharpening, with water the lubricating effect of grinding will be great and helps you to save strength
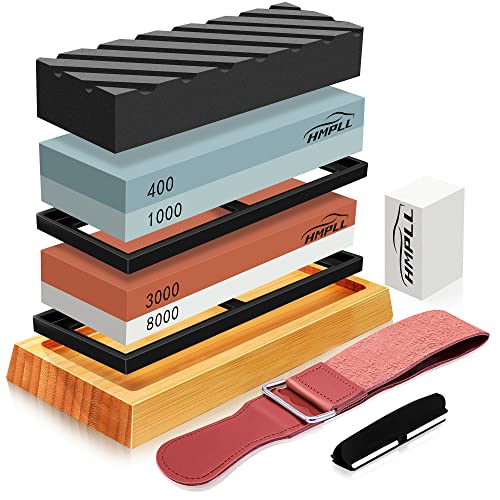
Professional Whetstone: 2 whetstones have difference grit which are 400/1000 and 3000/8000. The grit is accurate. 4 sides grit are satisfy with any knife blade needs. 400/1000 grit is typically used to repair knives with chipped edges and sharpen dull knives. 3000/8000 grit used to refine the edge and provide extra fine finish/polish on your blades.
Common Mistakes That Ruin Your Knife Edge
Misaligned edges are a common mistake that can ruin your knife’s performance. This happens when you rock the blade mid-stroke, causing the apex to round instead of sharpening to a sharp point. It also occurs if you apply uneven pressure or stroke counts, which shift the apex off-center and leave one side dull. Additionally, missing the full bevel at the tip and heel creates dull spots that reduce cutting effectiveness. To avoid these issues, steer clear of pull-through sharpeners and hard cutting surfaces that can chip or roll the edge. Keep your angle consistent throughout the process, use light pressure, and focus on removing the burr cleanly. Doing so helps you develop a durable, lasting edge that slices efficiently.

PREMIUM QUALITY - Experience superior sharpening with our professional 4-side whetstone set featuring 400/1000 and 3000/8000 grit white corundum stones, perfect for all kitchen knives, from high-end stainless steel to everyday culinary blades, ensuring precision and longevity.

PREMIUM QUALITY - Experience superior sharpening with our professional 4-side whetstone set featuring 400/1000 and 3000/8000 grit white corundum stones, perfect for all kitchen knives, from high-end stainless steel to everyday blades, ensuring precision and longevity.

【Premium Alumina Whetstone】Our whetstone knife sharpener (also a reliable honing stone) adopts high-grade aluminum oxide with proprietary sharpening compounds, making this knife sharpener stone deliver exceptional cutting performance. Strictly selected raw materials ensure the whetstones for sharpening knives are wear-resistant and long-lasting, outperforming ordinary sharpening stones for knives in sharpness retention and durability
How to Finish Sharpening and Clean Your Stone
Finishing sharpening and cleaning your stone is about how you stop, not just when. Always end on your finest grit with light pressure and a steady angle during the final passes. Wipe the blade clean between stages to prevent grit transfer, ensuring each stage remains effective. Once sharpening is complete, focus on maintaining your stone. Choosing the right honing oil for your stone type ensures it functions effectively and prevents damage. It is also critical to avoid harsh chemicals that can damage the stone’s binder. For ceramic sharpening rods, safe cleaning products like mild soap and water are recommended to prevent surface damage.
Use appropriate cleaning techniques for your stone type. Rinse water stones under running water and scrub with a soft brush to remove swarf. For stubborn buildup, use mild soap, then wipe the stone clean. Check for dishing or uneven wear—flatten any irregularities using a flattening plate or wet-dry sandpaper laid on a piece of glass. Keep the stone wet during flattening to prevent further uneven wear. For stubborn glue or residue, you can lightly run stones over high-grit sandpaper to restore usability.
After cleaning and flattening, let your stone air-dry fully on a ventilated rack away from direct sunlight. Proper drying prevents damage and prolongs your stone’s lifespan. For water stones, rinsing and drying are essential, while oil stones require solvent-based cleaning. Regular cleaning and maintenance improve the stone’s cutting performance and prevent clogging of the surface, ultimately extending its service life.

Knife Sharpener Stone Sharpening Oil to be used with your favorite sharpening system and Oil Stone to revitalize, maintain and preserve your tools, kitchen knives, utility knife and more

HONING SOLUTION – Smith’s Honing Solution features built-in stone cleaning agents and rust corrosion inhibitors and it can be used on all sharpening stones. This non-petroleum-based honing oil will prevent your sharpening stones from clogging.
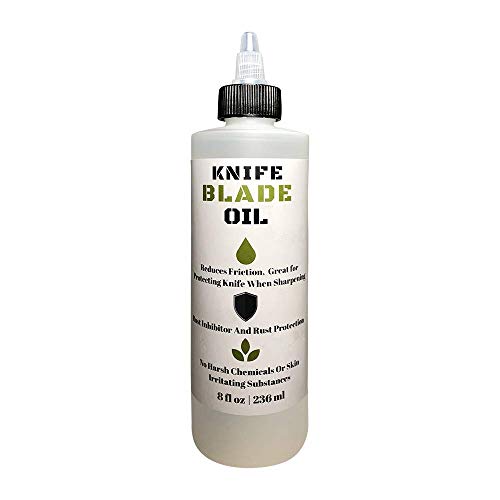
NATURAL & SAFE: Our Knife Blade oil is composed of 100% natural food-safe ingredients to provide worry-free use. While also providing superior protection for kitchen knives, pocket knives, and more
3 Quick Sharpness Tests to Check Your Edge
To verify your edge’s sharpness, run through these three quick tests that take only seconds and reveal what your sharpening really achieved. First, perform the paper slice test: hold a sheet of paper vertically and cut downward with the blade. A clean, effortless cut indicates a well-sharpened edge; if the paper catches or tears, more refinement is needed. Next, do the thumbnail test: gently rest the blade’s edge on your nail at a shallow angle. If the blade bites in, it has edge bite; if it skates across smoothly, the edge is dull. Lastly, try the arm-hair test by delicately moving the blade near your forearm hair. A sharp edge will shave cleanly, while a dull one won’t. These tests also help assess edge durability and show whether you’ve done more honing or actual sharpening. If the results vary along the blade, it points to uneven sharpening. Always check the entire edge, apply minimal pressure, and keep your fingers clear to avoid accidents. For a more tactile evaluation, the three-finger test involves sliding three fingers along the blade to feel for tiny microscopic teeth that indicate a sharp edge. For securely carrying your sharpened knife, you may also want to consider belt clips for knife sheaths to keep it readily accessible during outdoor tasks.
Build a Simple Sharpening Routine for Long-Lasting Edges
To build an effective sharpening routine that ensures long-lasting edges, start with a consistent angle between 15 and 20 degrees. Use a non-slip base for stability and choose a matching stone type—soak traditional water stones for 5 to 10 minutes or use splash-and-go stones that only need wetting. Begin with a 1000-grit stone, working from the heel to the tip of the blade until a burr forms. Flip the blade and repeat on the other side. Move to a 6000-grit stone for refinement, maintaining light, controlled strokes. Rewet the stone regularly by spraying it with water during the process to keep a consistent abrasive surface. Hone the edge weekly to extend the time between full sharpenings. Occasionally strop the blade for additional polish and edge durability. After each session, wash the knife by hand and dry it immediately to prevent rust. Proper storage—using a sheath or magnetic strip—protects the edge from damage and reduces wear. Regularly inspect the blade for chips or rust, and develop a cycle of frequent honing, periodic sharpening, and occasional stropping to keep your edge sharp and durable over time.

WHETSTONE KNIFE SHARPENER — NO SKILL, NO GUESSWORK Most people avoid whetstones because holding the correct angle is intimidating. The included angle guide locks your blade position automatically — making professional knife sharpening practically idiot-proof, even on your first try. No oil needed, no mess, no guesswork.
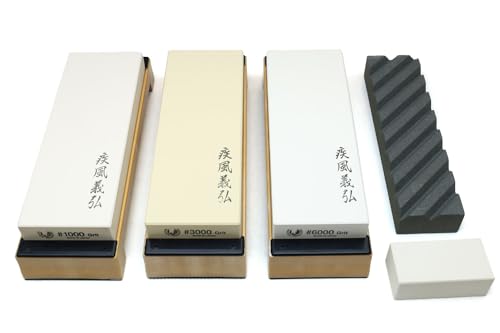
Grade : Toishi Sharpening Whetstone Full Set /Type: Japanese Sushi Chef Tool

Precision Sharpening:This sharpening stone set is crafted with high-quality materials, ensuring durability and long-lasting performance of the sharpening stones. It can quickly help you achieve professional-level sharpness for your knives. The dual-sided design of the sharpening stone includes 200/800 and 1000/6000 grits, making it perfect for both coarse sharpening and fine sharpening