If you’ve ever struggled to get your Japanese kitchen knives razor-sharp, you’re not alone. Proper sharpening can seem tricky, but with the right technique, you’ll be able to achieve a clean, polished edge that makes prep work a breeze.
By mastering a few simple steps with the right whetstone and consistent angles, you can keep your knives in top shape. Keep reading for the full step-by-step process that will turn dull blades into precise, cutting machines.
How Japanese Steel Changes Your Sharpening Technique
Because Japanese steels are generally harder than Western steels, you must adjust your sharpening approach accordingly. These steels often have a hardness of 60 to 66 HRC, which allows for an exceptionally sharp edge but also requires more delicate handling. Use a lighter touch and avoid applying heavy pressure during sharpening, as excessive force can cause micro-chipping or edge deformation. Maintain a consistent angle, typically between 10 and 15 degrees per side, across the entire blade—heel, middle, and tip—to ensure an even edge. High hardness amplifies any angle inconsistency, making precise and uniform technique essential. For optimal results, consider a cutlery set that matches performance and value for your specific sharpening needs. Just as processing deer demands a trustworthy blade, your sharpening setup should prioritize top butcher knives that maintain a stable edge through heavy use. A quality knife block can help protect your edges between sharpening sessions.
When working with carbon steels, expect a burr to form quickly; focus on detecting and removing it thoroughly on each side before moving to finer grits. For stainless or powdered steels like VG10, patience improves results, as these steels resist abrasion and require slower, more deliberate strokes on medium grits before progressing to finer ones. Proper technique ensures a razor-sharp edge while minimizing the risk of chipping or micro-damage, which is more likely with the increased hardness of Japanese steels.

Dual Grit Design (3000/8000) - Achieve razor-sharp precision with this two-sided whetstone: Use the 3000 grit for refining and the 8000 grit for ultra-fine polishing to restore a mirror finish on your blades

Premium Quality Sharpening Stone Materials: Quality White Corundum, 400/1000 and 3000/8000 knife sharpening stones suitable for most grinding operations, 4 types of grit work well with expensive or budget-friendly stainless steel kitchen knives

Set Up Your Whetstone Before You Sharpen
Setting up your whetstone properly is essential before you start sharpening. Begin by soaking synthetic stones in water for 10–20 minutes until no air bubbles appear; splash-and-go stones only require a surface splash before use. To ensure an even sharpening surface, flatten the stone with a lapping plate using figure-eight motions. Check for uniformity by drawing pencil grid lines across the surface—these will help you confirm consistent leveling. Secure the stone on a damp towel or a stable holder to prevent slipping under pressure. Stability is critical for both safety and achieving precise results. Keep a container of clean water nearby so you can re-wet the stone as needed, maintaining a good slurry and avoiding friction burns. Match your preparation process to your stone type: oil stones need oil instead of water, diamond stones typically do not require soaking, and always follow the manufacturer’s instructions for best results. Proper setup ensures you have a controlled, safe, and effective sharpening session, much like how Japanese folding knives prioritize stability for precise cutting performance. Stones that are not flattened properly can cause uneven sharpening and reduce the stone’s lifespan. This careful preparation reflects the same attention to detail that makes high-end craftsmanship so valuable in tools and presentation. Selecting a quality and value knife often relies on how well you maintain its edge through proper sharpening techniques.

Designed to Keep Your SHARPENING STONE in Optimal Condition! High-quality materials make it cut faster, wear more slowly, and are durable. this makes it the preferred choice for flattening
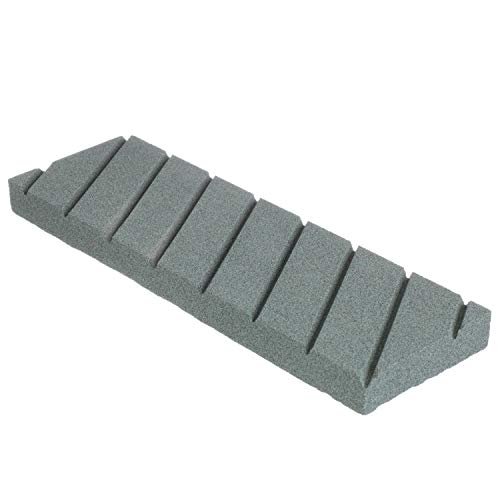
Care and maintain your tool and knife sharpener waterstone with this essential Norton Abrasives flattening stone
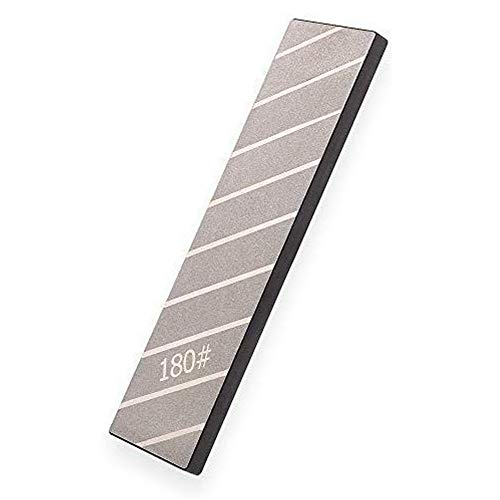
【Application】This diamond flattening stone is designed to Flat and re-level whetstone、oilstone、waterstone, or be used to re-bevel an edge of hatchet、axe、machete、spade、shears etc.
Find and Hold the Correct Sharpening Angle
The correct sharpening angle is typically 10–15° per side for most Japanese kitchen knives. For a gyuto or santoku, aim for 12–15° per side, while a nakiri benefits from a thinner 10–12° edge. To find this angle without a guide, use a marker to color the bevel, then make a light test stroke on the stone. Adjust your knife’s spine height until the ink is removed evenly across the bevel. Lock your wrist and keep the spine height constant during each stroke to maintain consistent angles. Use short, controlled passes to build muscle memory and avoid drifting out of position. If unsure, start at 15° per side—it’s more important to maintain a steady angle than to chase a perfect number. Frequently reapply the marker and check your bevel to ensure you haven’t lost the angle. Remember, consistency is more crucial than an exact angle, so focus on steady, repeatable strokes. After sharpening, oil your cutting board to protect the surface and prevent dulling of your freshly honed edge. Because Japanese blades are typically forged from harder steel, a slightly more acute angle preserves their characteristic cutting performance while still offering adequate durability for everyday tasks. To avoid damaging the blade, always store Japanese knives separately from western-style cutlery in a block or on a magnetic strip.
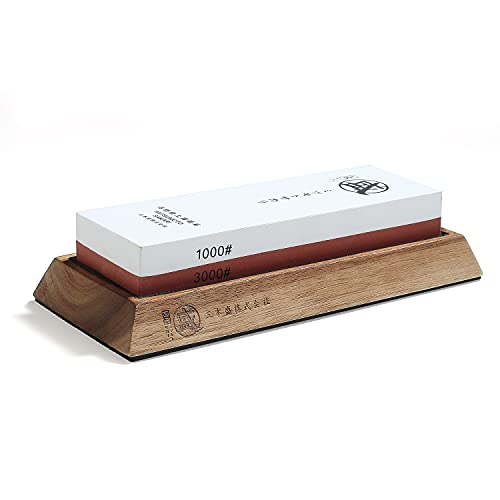
1000/3000 Grit Dual-Sided Whetstone: 1000 grit side quickly repairs dull edges and reshapes worn blades for daily meal prep; 3000 grit side hones and polishes edges to a smooth, razor-sharp finish for clean cuts of meat, fish, vegetables and fruit.

【Complete Knife Sharpening Stone Kit】You don't need to be a Pro to sharpen your blades, all you need is the right tools & technique. All the sharpening tools you need are here, one affordable set for you: 400/1000 & 3000/8000 grit whetstone; Coarse flattening stone; Non-Slip Bamboo base; Knife sharpening angle guide; Leather strop, a simple instruction manual about how to use and what does every component do.
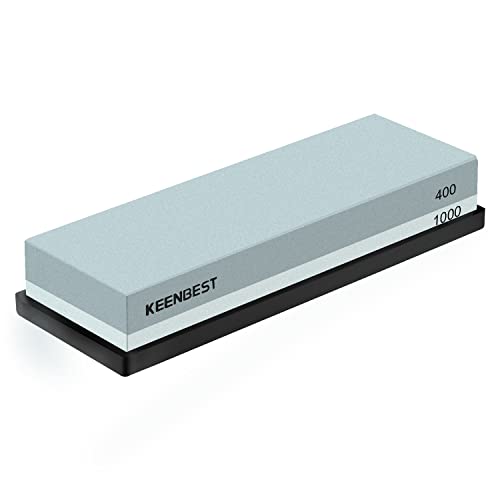
No oil needed, just put the stone into water for 10-15 minutes before using and they are ready to use. You can always adding water on it while sharpening, with water the lubricating effect of grinding will be great and helps you to save strength
Master the Sharpening Stroke for Double-Bevel Knives
The stroke technique is where your sharpening effort really pays off. For double-bevel knives, use the same pattern on both sides. Keep the blade edge-first as you slide it into the stone with a smooth, forward motion—like shaving a thin slice off. Use light to moderate pressure, easing up during the return pass. Control the blade with your fingers close to the edge to avoid rocking or sawing motions. Make sure the stroke is straight from heel to tip, maintaining handle ergonomics to prevent strain or uneven sharpening for both sides. Using a properly sharpened knife on soft butter is far easier with knives with holes, which prevent sticking and ensure even spreading. Similarly, a well-maintained edge reduces the need for excessive force, which is why quality and performance reviews often highlight how a sharp blade improves overall control during prolonged use.
Alternate sides every 5 to 10 strokes to keep the bevel centered. Focus on maintaining a steady rhythm and even coverage. If your blade is very dull, you might need to work section by section for better precision. When the edge is sharp enough, a burr will form along the bevel—this indicates the edge is set. Removing the burr, or knot, requires lighter, alternating strokes until it is gone, trusting the stone to do the work for you. Bamboo cutting boards, however, require separate care as they can warp or crack in the dishwasher, unlike your sharpened knives.
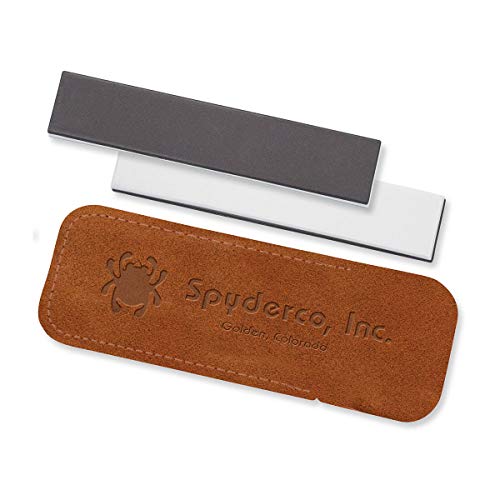
Compact & L:ightweight Sharpening Stone - This lightweight pocket stone is designed for on-the-go edge maintenance, making it ideal for sharpening knives, tools, and outdoor gear wherever your adventures take you.

🔪Function:This dimaond knife sharpener can be used for any item you want to sharpen and polish, including kitchen cutlery, scissors, Outdoor tools or pocket knives, Also works for gardening tools.

FAST, Durable and Heavy-Duty: Industrial monocrystalline diamonds are electroplated onto a stainless steel base of 0.33 inch thickness. Up to 5 times faster sharpening than oil stone, water stone
Which Whetstone Grit to Start With (And When to Switch)
For repairing chips or heavy damage, start with a coarse grit around #220 to #600. These stones reshape the edge quickly and remove visible flaws. Use the coarse stone only until the damage is gone and the bevel is re-established. Once the edge looks even and the chips are gone, switch to a finer grit like #1000 to refine the edge. For regular upkeep, a #1000 stone is often enough to keep your knife sharp, but selecting a stone with consistent particle size ensures a more precise edge even at this stage. When choosing a stone, consider the material of your butcher block, as a hard end-grain surface helps protect the blade during honing.
You’ll know it’s time to move up when you feel a burr forming along the edge after using the #1000 stone. This burr indicates the edge has been shaped and the next step is polishing and refining. After developing a burr, progress to a finer stone such as #3000 to #6000. This step smooths out microscopic flaws, creating a sharper, more polished edge.
Matching your grit choices to your knife’s condition is key. Use coarse grits for repair jobs, medium grits to restore cutting performance, and fine grits to polish and maintain. Jumping to a very fine grit too early can result in an underdeveloped edge that doesn’t cut well. For regular upkeep, a #1000 stone is often enough to keep your knife sharp without unnecessary steps.

King 01096 1000/6000 Grit Deluxe Combination Stone

Beginner-Safe Angle Control (No Guesswork): This whetstone knife sharpener features built-in adjustable angle guides (15° / 17° / 20° / 22°) to help beginners maintain a consistent sharpening angle. Reduces uneven edges and protects expensive knives — unlike cheap sharpening stones that rely on freehand skill.

✔ PROVIDES YOU AN EASE IN SHARPENING YOUR KNIFE - This Knife Sharpener is made in Japan whose quality is close to a natural whetstone. It has whetstone on both sides i.e. one side is 1000 for main sharpening and other side is 6000 for finish sharpening making it easy for you to sharp your knife in less time.
Check for a Burr and Finish the Edge
Check for a burr after sharpening by running your thumb perpendicular to the edge on the side opposite the stone. A slight catch or roughness indicates the presence of a burr—a thin ridge of displaced metal that signals the edge is fully apexed. Carefully run your finger from heel to tip to feel for a continuous burr along the entire length of the blade. If you detect one, it means you should proceed to burr removal before moving on. A wire edge, which is just a thin, unremoved wire left on the blade, feels different from a properly formed burr and must be distinguished to avoid dullness. Just as over-oiling a bamboo board can leave residue that compacts and dulls the wood’s surface, failing to remove the burr thoroughly prevents the blade from achieving a true edge. Achieving a true edge is comparable to ensuring the highest quality materials on a charcuterie board are properly finished and free of defects. Similarly, selecting a carving board with a smooth, defect-free surface ensures your knife edge stays sharp during use.
To remove the burr, alternate light strokes on each side of the blade using very gentle pressure. After each pass, recheck for the burr; it should gradually diminish with repeated light strokes. Continue refining with an even finer stone until the edge feels smooth under your fingertip and no longer catches. Finally, inspect the edge under bright light; the reflective line should no longer be visible. Once both sides are even and the burr is gone, your edge is clean, sharp, and ready for use.
Clean, Dry, and Protect Your Sharpened Knife
After sharpening your knife, always clean, dry, and protect the blade to maintain its edge. Immediately hand wash the knife with warm water and mild soap. Wipe along the blade from the spine toward the edge, away from your hand to avoid injuries. Dry the entire knife thoroughly with a clean towel, including the handle and heel. Any residual moisture can lead to rust, especially on high-carbon steel blades, so air-drying is not enough.
For storage, never toss the knife loose in a drawer. Instead, use a magnetic strip, blade guard, or knife block, inserting the blade spine-first. Keep the storage area clean and dry to prevent grit and trapped moisture, both of which can dull the edge quickly. Always isolate the blade from hard surfaces and contact with metal during cleaning and storage. Regularly inspect your knife for rust or damage to ensure it stays in top condition. Proper maintenance extends the sharpness and lifespan of your knife significantly.