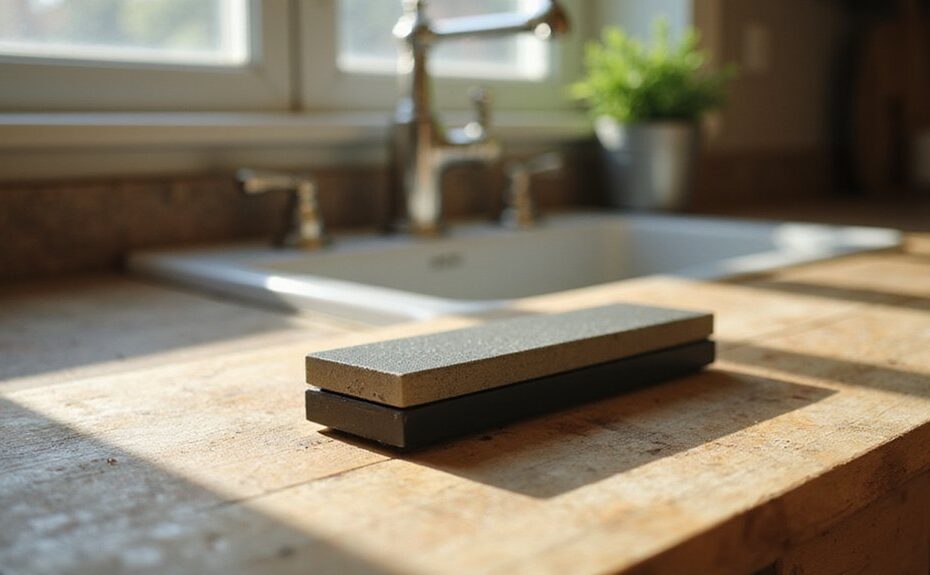
Wondering how to sharpen your dull kitchen knives? A properly sharpened knife is safer and more effective, making prep work much easier.
By the end, you’ll know how to use a whetstone to bring back that crisp edge, even if you’re new to the process. Keep reading for simple steps that will make your knives feel like new.
Is Your Knife Dull or Just Misaligned?
To determine if your knife is dull or just misaligned, start with a visual edge test under bright light. Bright reflections or glints indicate worn spots or dullness, while a fine, continuous line suggests a more even edge. If your cutting is uneven or only affects one section, it points to misalignment rather than dullness.
Perform a burr check to confirm if the apex contact is proper. A uniform burr along the entire edge means you are hitting the apex correctly. No burr indicates you may be missing it altogether. Keep in mind that softer blade materials, like certain stainless steels, tend to show misalignment before actual wear. If you are honing weekly, understanding your blade’s quality and performance can also help you avoid unnecessary sharpening. The cost of a replacement knife often reflects the materials and design logic used in its construction.
Understanding whether you’re dull or misaligned helps you decide how often to sharpen. A dull blade requires more metal removal, while a misaligned edge can be corrected with realignment alone. Confusing the two causes unnecessary sharpening, which wears down your blade faster. For serious edge restoration, consider using Japanese sharpening stones for precise results.

【Complete Knife Sharpening Stone Kit】You don't need to be a Pro to sharpen your blades, all you need is the right tools & technique. All the sharpening tools you need are here, one affordable set for you: 400/1000 & 3000/8000 grit whetstone; Coarse flattening stone; Non-Slip Bamboo base; Knife sharpening angle guide; Leather strop, a simple instruction manual about how to use and what does every component do.

Premium Quality Sharpening Stone Materials: Quality White Corundum, 400/1000 and 3000/8000 knife sharpening stones suitable for most grinding operations, 4 types of grit work well with expensive or budget-friendly stainless steel kitchen knives
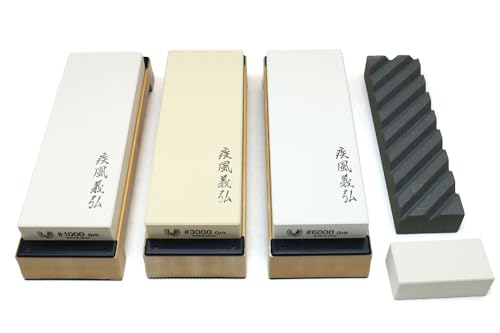
Grade : Toishi Sharpening Whetstone Full Set /Type: Japanese Sushi Chef Tool
What’s the Best Sharpening Method for a Beginner?
The whetstone method is the best overall choice for beginners because it offers a good balance of cost, control, and learning experience. Using a medium grit stone, around 800 to 2000 grit, allows you to practice controlled metal removal while minimizing the risk of over-sharpening. This grit range helps you develop a clear understanding of how to shape the edge and see the formation of the bevel and burr, providing direct feedback on your technique. This process of creating a burr indicates that successful side honing has occurred, confirming the edge is properly formed. For blades with scalloped edges, you must follow the individual tooth geometry rather than a flat sweep, which is why the correct angle changes for each serration. For particularly flexible fillet knives, maintaining a consistent angle is even more critical to avoid damaging the thin blade.
With whetstones, you can progress from coarse repairs to fine finishing on the same system, which improves your consistency as your stroke pattern becomes more stable. You will need to hold a steady angle, apply light to moderate pressure, and count strokes on each side to develop good habits. Choosing a sharpening stone type like water stones rather than oil stones or diamonds can significantly affect your learning curve. Water stones, in particular, are popular among beginners because they cut faster and are easier to use compared to oil stones or diamonds. Electric sharpeners tend to remove metal quickly and can be harder to control, making whetstones the preferred choice for effective, precise learning.
Which Sharpening Tool Should You Use First?
Start with a simple manual pull-through sharpener. It securely locks the blade at the correct angle, making it easier to focus on technique without guessing. This type is quick and effective for refreshing the edges of standard Western knives when they just need light dullness correction. Handle comfort is less critical here since you’re not controlling the angle precisely. Check your blade material before using; pull-through sharpeners work best on light dullness and are not suitable for chips or severe damage. Once comfortable, move on to guided sharpening systems, which have built-in angle controls for consistent results and less guesswork. As you progress, handle comfort and control become more important with multi-stage tools. Avoid honing rods for now—they’re maintenance tools, not actual sharpeners. Save freehand whetstones for later, since they require developing a steady hand and technique. Electric sharpeners are fast but can remove too much metal quickly, so they are best avoided when starting out.
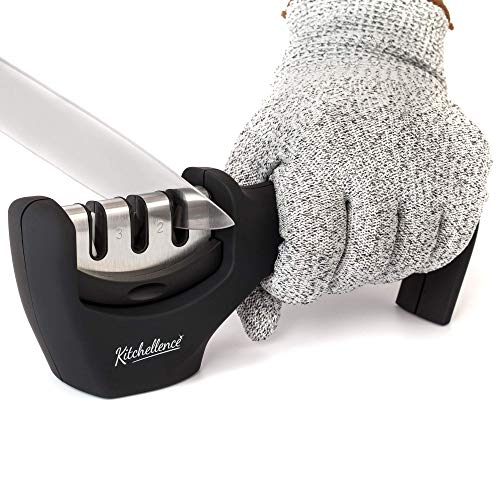
3-Step Knife Sharpener: With our incredible 3-slot system, we’re revolutionizing the art of knife sharpening! The 1st diamond sharpening rod repairs and straightens damaged blades before the 2nd slot sharpens to restore its V-shape. Finally, the 3rd slot fine tunes for a clean polish.

EASY TO USE KNIFE SHARPENER: This is the perfect knife sharpener for chef’s knives, paring knives, serrated knives, filet knives, cleavers – you name it. If you own a knife, you need this sharpener.
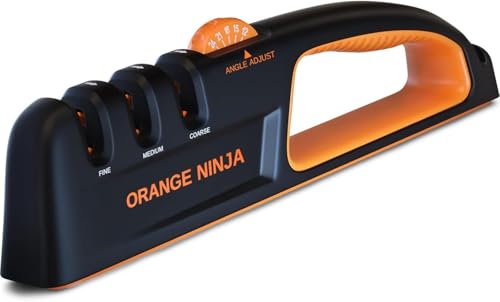
Sharpening Simplified: This adjustable angle knife sharpener gives you a professional-level razor sharp edge by allowing you to sharpen your blades at the correct sharpening angle (12°, 15°, 18°, 21°, & 24°). Designed for straight-edge blades only; NOT suitable for serrated knives or scissors.
How to Soak and Stabilize Your Whetstone
To soak your whetstone properly, submerge it until air bubbles stop rising—typically about 10 to 15 minutes. This duration ensures the stone is fully saturated with water, which is essential for effective sharpening. Keep in mind that different types of stones may require varying soaking times: fine-grit stones often need longer soaking, while splash-and-go varieties only need a quick wetting. Over-soaking bonded stones can risk cracking, so always check your manufacturer’s guidelines to determine the appropriate soaking period. Consistent blade geometry, as highlighted in reviews of premium chef knives, depends on a properly prepared stone surface. Much like applying a clean, long-lasting finish to a cutting board, proper stone preparation ensures the tool performs at its best. For similar reasons, selecting a knife with appropriate blade geometry for skinning ensures clean cuts and minimal meat waste.
Before you start sharpening, stabilize your stone by placing it on a non-slip base or a rubberized sharpening holder to prevent movement. If dedicated tools are unavailable, a damp towel can serve as a temporary stabilizer. Ensuring the stone stays steady is crucial for maintaining a consistent angle and avoiding safety hazards caused by slipping. Test the stability of your setup before each use to ensure it’s secure.
Keep water within reach during the process to re-wet the surface as needed. A dry stone reduces abrasive efficiency and might cause the blade to catch or slip. Do not disturb the slurry—the mixture of water and tiny particles created during sharpening—as it plays a key role in honing your blade. After use, dry your stone following the manufacturer’s instructions to prevent damage and prolong its lifespan.

Keep your knife sharpening stone from moving during use with this dual-sided, textured silicone mat, making it an essential accessory for your at home sharpening needs

[Made in Japan] Ceramic whetstone made in Japan. It comes in a set with a Nagura stone. We cooperate with Japan domestic factories to deliver Japanese-made whetstones at reasonable prices through centralized management from planning to delivery.
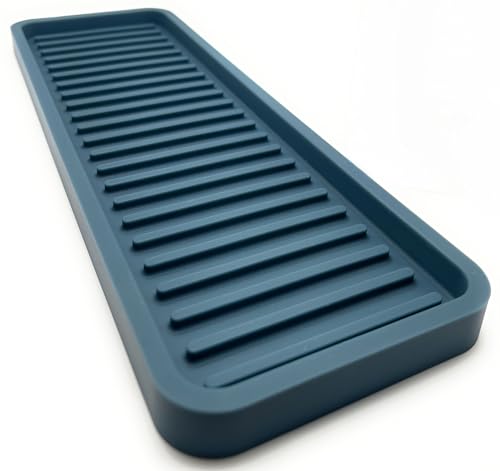
Premium Silicone Construction: Crafted from high-quality, food-grade silicone material that is durable, flexible, and heat-resistant, ensuring long-lasting performance in your kitchen while protecting your countertops from water damage and scratches
Step-by-Step: Sharpen Your First Knife
To sharpen your knife properly, ensure your stone is soaked and stable. Place it on a non-slip surface with the coarse side facing up, and keep a damp cloth underneath to prevent movement. Hold the knife handle firmly with one hand and guide the blade near the edge with the other—this maintains good ergonomics for control. Start at the heel of the blade, aligning the entire edge at a 20-degree angle. Use slow, smooth strokes from heel to tip, applying moderate pressure. Perform about 10 strokes per side, making sure to keep the angle consistent throughout. Flip the knife and repeat these steps on the other side evenly. After several alternating strokes, switch to the fine grit side of the stone. Use lighter, fewer strokes here to refine and polish the edge. Rinse the blade, dry it completely, and test its sharpness on soft food—if it slices cleanly, the sharpening is successful. Store your knife safely once it’s sharp. Choosing a high-quality cutlery set can also help maintain edge longevity when you start with well-made knives. For consistently precise results, consider using a top meat slicer for uniform cuts. A dedicated carving set can also improve your control and accuracy when slicing larger roasts.

It makes sharpening blade edge like a pro!

𝐀𝐜𝐡𝐢𝐞𝐯𝐞 𝐫𝐚𝐳𝐨𝐫-𝐬𝐡𝐚𝐫𝐩 𝐞𝐝𝐠𝐞𝐬 𝐞𝐯𝐞𝐫𝐲 𝐭𝐢𝐦𝐞: SHARPAL 194H is the perfect tool to ensure that your knives, chisels and Plane Iron Blades are always sharpened at the correct angle, resulting in sharper edges that last longer.
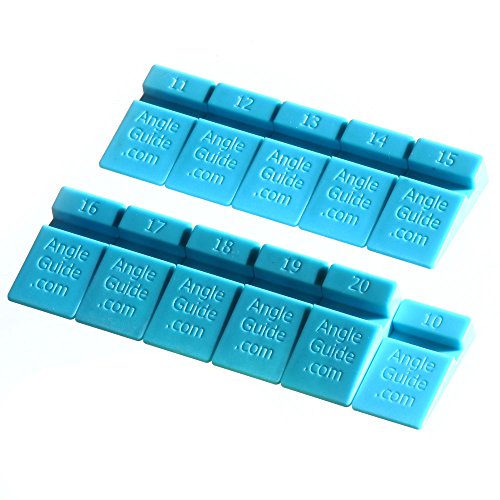
Model: Wedgek AGM Medium size. For larger size model Wedgek LR5 is available.
How to Check for a Burr During Sharpening
To check for a burr during sharpening, you need to look for a thin, wire-like edge fold that forms on the side opposite your stone contact. The most reliable confirmation comes from feeling for the burr with your fingertip or thumb pad, moving from the spine toward the edge—not along it. A burr will typically feel like a slight catch or roughness along the blade’s side. For further refinement, a quality brisket knife relies on achieving a consistent burr across the entire edge before moving to finer grits. Perform this check at multiple points along the edge, including the tip and heel. Consistent burr formation across these spots indicates even contact with the stone; missing burrs suggest uneven sharpening, meaning more work is necessary. To improve accuracy, you can also gently drag your fingernail across the edge to detect any reflective line or use bright light to spot the burr more clearly. Unlike plastic cutting boards, sharpen steel knives are much easier to maintain because they are not recyclable in standard curbside bins and require separate disposal. Always remember that proper dishwasher placement can help protect a newly sharpened edge from damage during cleaning.
Don’t move to finer grits until you have confirmed the presence of the burr on that side. This step ensures you’ve successfully refined the edge and prevents premature switching, which could lead to a less sharp or uneven blade. Remember, patience in identifying the burr is key to a well-sharpened edge.
Finish Your Sharpening: Polishing and Removing the Burr
Once you’ve confirmed a burr on both sides, the final step is to polish the edge and completely remove that burr. Switch to your finest stone and use very light, edge-trailing passes. Apply almost no pressure; this helps weaken and detach the burr rather than fold or create new imperfections. Alternate sides with just a few quick strokes to keep the edge centered and enhance its appearance. Unremoved burrs cause rough edges that negatively affect cutting performance, so burr removal is crucial for a clean final result.
For the ultimate polish, use a leather strop coated with a fine compound. Make 10 to 15 gentle edge-trailing passes per side, maintaining light pressure throughout. Heavy stropping can round the edge, undermining your sharpening effort. If you lack a strop, you can also use soft wood or even newspaper for gentle burr removal. These polishing methods help refine your edge and eliminate delicate wire edges that could compromise cutting performance. When using a stone for the final passes, a thin honing oil can improve the cutting action and help carry away metal particles for a smoother finish. For serrated blades, a specialized ceramic sharpening rod can be used to reach each scalloped tooth without altering the blade’s original shape. Just as the right board can make serving charcuterie easier, using the proper sharpening tools ensures your knives perform at their best.
Check the blade’s sharpness by trying to cut cleanly through paper without snagging or tearing. If a burr is still present, go back to light, alternating stone passes before stropping again. This ensures a razor-sharp, clean edge ready for use.
3 Mistakes That Ruin Your Edge (And How to Fix Them)
Even if you’ve mastered the technique, a few common mistakes can still ruin your edge before you finish. The most critical is an improper angle. If you change the angle mid-stroke, the bevel becomes rounded, which destroys consistency. To prevent this, lock your wrist and match your initial bevel from the very start. Incorrect Sharpening Angle causes Japanese knives to become too fragile and Western knives to lose their robust durability.
Pressing too hard on the stone is another mistake. Excessive force flexes the edge, increasing the risk of chips. Instead, apply light, steady pressure and let the stone do the work. This approach helps maintain control and produces a cleaner edge.
Using the wrong grit progression can also waste steel or fail to properly reset a dull edge. For regular sharpening, start with around 1,000 grit. Reserve coarser grits of 200 to 400 for serious edge repairs. Rushing through your strokes—doing more than five to ten without inspection—kills control and may dull the edge further. Take your time, inspect regularly, and ensure your stone stays wet and flat to preserve the edge you’ve worked so hard to create.
How Often Should You Hone vs. Sharpen Your Knives?
Honing should be performed far more often than sharpening because it simply realigns the existing edge without removing metal. For regular home cooking, a weekly honing routine maintains your knives’ performance. How often you sharpen depends on your usage; typically, you’ll need to sharpen every 2 to 4 months if you cook actively. A good rule of thumb is to hone about 10 to 15 times between sharpening sessions. For a similar focus on quality and craftsmanship, you might appreciate comparing top charcuterie boards to understand how different materials affect performance and value. Storing your knives properly helps maintain their edges, and drawer storage holders can protect blades between uses.
Heavy users, such as professional chefs, hone daily and sharpen every 2 to 4 weeks to keep their knives in top shape. Instead of sticking to a strict schedule, watch for signs that indicate it’s time to sharpen. If honing no longer restores a clean cut or you notice the knife struggling to slice through tomatoes, it’s time to sharpen. A simple paper slice test can help determine dullness—if your knife tears the paper instead of slicing smoothly, sharpening is needed. When cutting becomes more resistant despite honing, sharpening should be scheduled sooner rather than later. Think of honing as routine maintenance to keep your edges aligned and sharpenings as periodic restorations to restore the blade’s original sharpness.

KEEPS KNIVES RAZOR-SHARP: Maintain knife edges between professional sharpenings.

Premium Steel Construction - The steel rod is made of carbon steel and plated with nickel-chrome; the fine surface of the steel rod prevents the cutting edge from damage when sharpening.

KITCHEN KNIFE SHARPENER FOR ROUTINE CARE: Keep frequently used knives ready for everyday prep. This honing rod helps maintain and refresh the cutting edge between more intensive sharpening sessions, making regular knife care quick and straightforward.