
If you want your cutting board to stay smooth, protected, and looking great, applying the right finish is key. Using Walrus Oil is a popular choice because it penetrates deeply and nourishes the wood.
With a simple process, you can keep your board in top shape and enjoy using it for years to come. The steps below will guide you through applying Walrus Oil properly.
Why Surface Prep Matters for Walrus Oil Finishes
Surface prep is essential for ensuring proper bonding of Walrus Oil finishes on a cutting board. First, you must guarantee Surface cleanliness. Food residue, soap film, or dust can block the oil from penetrating the wood. After sanding, thoroughly remove all dust so particles don’t sit in the finish layer. A clean surface promotes even absorption and prevents patchy buildup. Choosing a high-quality cutlery set can also help maintain the board’s appearance by avoiding scratches from inferior blades. Investing in a premium knife block set ensures the blades stay sharp and reduce unnecessary wear on the board surface. The higher costs of premium boards often reflect the use of dense hardwoods and meticulous craftsmanship that resist deep cutting marks.
Next, address Grain removal using the sand-wet-sand method. Wetting the board raises grain fibers, which you then sand off before applying the oil. This step prevents a rough texture after finishing and stops grain from lifting later, which can ruin the silky feel. Make sure your board is completely dry—moisture content should be below 10 percent—so fibers absorb the oil evenly. Damp wood traps water beneath the finish, reducing protection and durability. Proper surface prep ensures your board finishes smoothly and performs well over time. Starting with 60 grit sandpaper to address deep valleys and flatten the surface provides a stable foundation for achieving a uniform finish.

SIMPLE INGREDIENTS - Beeswax, Fractionated Coconut Oil, Pure Mineral Oil, and Vitamin E

EASY TO USE: Complete Cutting Board Maintenance Kit for simple and effective wood care

FDA Food-Contact Safe Ingredients
What Grit Should You Use When Sanding a Cutting Board?
Start sanding a cutting board with 60 to 80 grit abrasive pads if you’re removing deep scratches or damage. These coarser grits quickly level out the surface but can leave noticeable scratches. Once you’ve achieved the desired initial smoothness, move up through finer grits—100, 120, 150, and 180—progressively refining the surface. Finish at 220 grit to create a smooth, oil-ready surface. This stepping process ensures scratches from previous grits are removed at each stage, preventing them from reappearing under oil and ensuring a consistent, uniform finish. Using this gradual approach enhances color by allowing Walrus Oil’s natural hues to absorb evenly, and it also aids stain masking by reducing light distortion caused by uneven scratch patterns. For boards with minor wear, you can start with 150 or 180 grit, but avoid going beyond 220 on long-grain boards, as over-polishing can reduce oil absorption and diminish color richness. Applying a similar progressive approach to sharpening serrated blades requires the correct angle and a suitable stone, such as Arkansas stones for their fine-grained consistency, to restore a keen edge.
How to Apply Walrus Oil for Maximum Absorption
To achieve maximum absorption, start by ensuring your wood surface is completely clean and dry. Any soap residue or food particles can block the pores and hinder deep penetration of the oil. Pour a generous coat directly onto the wood, focusing on the grain. The oil should be fluid enough to spread smoothly; if it’s too thick, it won’t soak in effectively. Use a brush or a lint-free cloth to work the oil into every edge, handle, and groove, making sure you reach all tiny crevices. Do not just give it a quick pass; allow the oil to pool slightly in areas so the wood can “drink” it up. Cover all thirsty spots, especially end grain, which absorbs oil the fastest. For bamboo boards, avoid common mistakes like using too much oil that pools on the surface, which can lead to sticky residue. Aim for a saturated surface without any puddles to ensure maximum penetration. For new or particularly dry boards, apply a slightly heavier layer across the grain to encourage deeper absorption. Edges and corners tend to soak up oil quickly, so include them in your application. Let the oil sit and soak in for at least 20 to 30 minutes before checking; however, leaving it overnight yields the best results for maximum absorption. This oil’s FDA food-contact safe certification confirms it is suitable for routine maintenance of wooden surfaces that touch food. The same principle of design logic applies here: just as a butter knife’s notch prevents messy buildup during use, applying oil in thin, even layers avoids sticky residue on your board.
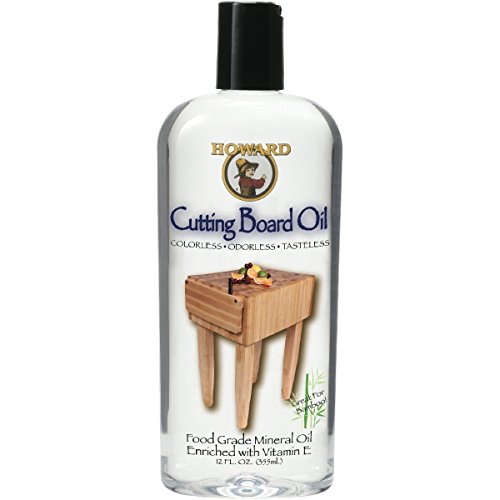
Cutting Board Oil is a deep penetrating 100% Pure USP Food Grade Mineral Oil that is tasteless, odorless, colorless, and will never go rancid

Revitalizing blend prevents drying and cracking of hardwoods and bamboo

FOOD-GRADE MINERAL OIL FOR CUTTING BOARDS: Helps restore and protect dry cutting boards, butcher blocks, and wooden kitchen surfaces. Refreshes dull, worn wood and helps prevent cracking or splitting; works on bamboo, teak, acacia, olive wood, and hardwood boards
First Coat Rules: Why Thorough Absorption Matters Most
The first coat of Walrus Oil is the most critical step because it ensures thorough absorption. Instead of just wetting the surface, you want to feed the wood grain. Work the oil in until the board stops soaking it up, leaving no visible wet spots. This deep penetration helps condition the fibers and boosts water repellency. This process mirrors how charcuterie boards require proper sealing to prevent stains and bacterial absorption. Rushing this step can cause dry patches that leave areas underprotected, risking damage over time. Ensuring your knife holder storage is placed away from the application area helps maintain a safe, dry workspace.
A fully saturated first coat creates a uniform finish, preventing patchy color and inconsistent shine. After applying, buff away any excess oil to avoid pooling and a greasy feel. The goal is a smooth, hydrated surface, not a slick coating. Be sure to cover every edge and face evenly, as this base layer influences how well subsequent maintenance layers adhere and perform. Taking your time ensures your cutting board remains well-protected and looks great longer. Similar to how Mechanix Gloves offer dependable cut resistance, this thorough absorption provides dependable moisture resistance.

FDA Food-Contact Safe Ingredients: Formulated with ingredients that comply with FDA standards for food contact surfaces


FDA Food-Contact Safe Ingredients
How Long Should You Let Walrus Oil Dry Before the Second Coat?
Let Walrus Oil dry for 12–24 hours before applying the second coat. This drying period allows the oil to fully penetrate and be buffed clean, ensuring optimal absorption. Temperature and humidity can impact drying time; cooler rooms or high humidity may extend this window beyond 24 hours, so don’t rush it. Check for oil penetration by feeling the surface—if it still feels glossy or oily, it’s not ready. Dense or freshly sanded wood often requires the full 24 hours to absorb the oil properly. After this wait, buff away any remaining residue, and you’ll be prepared for your second coat. Keep in mind, this drying time is between coats—full curing takes 1 to 2 days after your final application. Sticking within the 12–24 hour window helps your board soak up the oil evenly and achieve a smooth, protected finish.
When to Add a Second Coat (and When One Coat Is Enough)
A second coat of Walrus Oil is needed when the first coat leaves dry spots, or the wood still appears pale and thirsty. If the surface looks evenly conditioned, with the wood no longer absorbing oil quickly and a uniform matte finish, then one coat is sufficient. Typically, one coat covers about 25-30 boards, making it a potent and efficient option for most cutting boards. Adding a second coat can enhance color depth without making the surface sticky, but only if the grain is unusually porous or if the first layer shows uneven absorption. For matching an existing finish sheen, one coat usually does the trick. Remember, new or raw boards tend to benefit from an extra application to ensure thorough conditioning. Unlike Italian charcuterie boards, which rely on carefully arranged cured meats for their appeal, Walrus Oil’s performance depends on the wood’s absorption rather than presentation.
How Often to Reapply Walrus Oil on Heavily Used Boards
For heavily used boards, you should reapply Walrus Oil every 1 to 2 months. This schedule is more frequent than the typical once- or twice-yearly recommendation because everyday use, frequent washing, and exposure to water accelerate oil loss. Keep an eye on your board’s appearance: if it looks dry, faded, or water no longer beads on the surface, it’s time for a fresh coat. Seasonal factors matter too—dry indoor winter air can speed up the need for reapplication, sometimes every few weeks. Instead of sticking to a fixed schedule, monitor the condition of your board. Heavy cleaning with hot water, strong detergents, or heavy knife work can strip the oil faster, revealing fresh wood. Check your board after each cleaning; if it feels parched or shows signs of wear, reapply Walrus Oil. This condition-based approach ensures your board stays protected during heavy use, rather than relying solely on calendar intervals. To keep the board hygienic, you should also avoid using harsh cleaning products that can dry out the wood. Storing your board in a best knife holder can help prevent accidental nicks and scratches that further expose the wood. Just as a cherry pitter efficiently separates the pit from the fruit without damaging the flesh, a well-oiled cutting board relies on the oil to fill its pores and create a protective barrier against moisture and bacteria.
