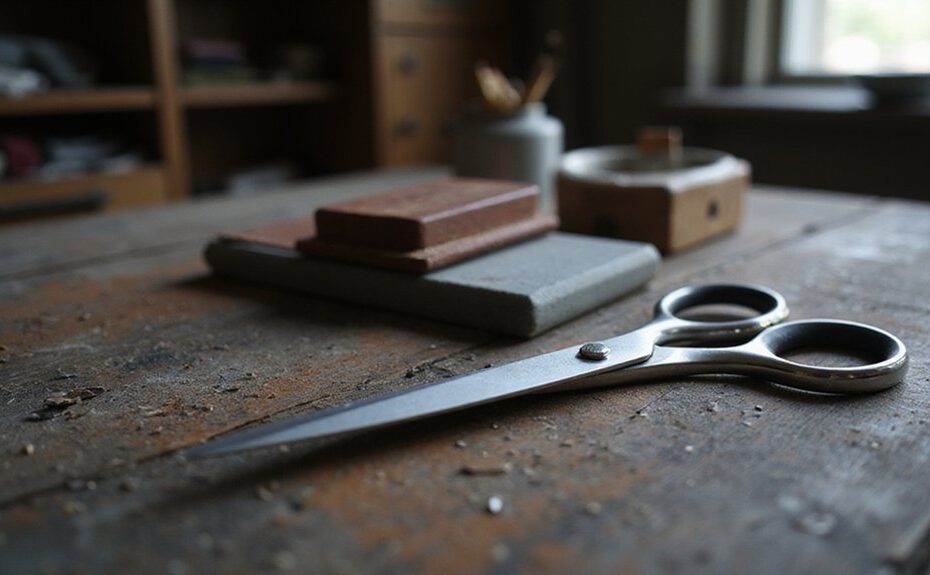
If your curved scissors no longer cut smoothly, sharpening them can breathe new life into their blades.
The key is to follow the correct technique to keep the curve intact and achieve a clean, precise edge.
With a few tools and some careful steps, you can restore their sharpness and make your cuts easier.
Keep reading to learn how to sharpen your curved scissors effectively.
Why Curved Scissors Are Different to Sharpen
Sharpening curved scissors is more challenging than straight blades because the curve requires following a precise arc on the sharpening wheel. Unlike straight blades, you can’t simply set the blade perpendicular; you must track the entire curve to maintain the correct bevel angle and edge profile. The tip and throat contact the wheel at different points, so you need to pull the blade outward to follow the curve accurately. Failing to do this results in uneven edges and compromised cutting performance. To avoid this, choose chicken shears that are designed with durable, high-quality steel for easier maintenance. You must also maintain consistent bevel angles throughout the process to preserve the tool’s intended cutting geometry. For best results, consider using a high-quality sharpening mat to protect your work surface and steady the blades during sharpening. Achieving the best possible edge on curved scissors often depends on the steel hardness and edge retention of the blade material.
You also need to be mindful of the bevel angle and how the edge curvature affects the sharpening process. Preserving the original profile is essential because altering it can diminish the scissors’ effectiveness. Material composition plays a role too—different metals respond variously to abrasives, affecting how easily the curved edge can be refined. Additionally, curved scissors require more frequent sharpening since uneven wear and alignment errors become more visible, potentially causing jagged cuts if neglected for too long.
The Tools and Materials You’ll Need for Sharpening Curved Scissors
To sharpen curved scissors precisely along their arc, you’ll need a combination sharpening stone or whetstone. Select a stone with coarse grit (100–400) for removing dullness and a fine grit (1000+) for honing and polishing the edge. For maintaining the correct curvature, a round dowel or tapered diamond rod is essential, as it allows you to rock the blade along its arc segment-by-segment. Historically, water stones were popular for this purpose, especially in Japanese techniques, which favor water as a lubricant, unlike Western oil stones that use honing oil. Match your choice of lubricant to the stone type: water for water stones and honing oil for oil stones. For a similar sharpening principle applied to larger kitchen tasks, electric carving knives also require consistent edge maintenance for top performance. Understanding which types of sharpening stones earn a place in your kitchen can help you select the right tool for curved blades as well. For a more elegant presentation of your sharpened tools, pairing them with a fine charcuterie board can elevate your entertaining setup.
Safety is crucial, so wear cut-resistant gloves and work over a non-slip surface to prevent accidents. After sharpening, a leather strop coated with buffing compound can refine the edge further and remove microscopic burrs. Finally, test the sharpness with scrap paper to ensure a clean cut, adjusting your technique as needed.
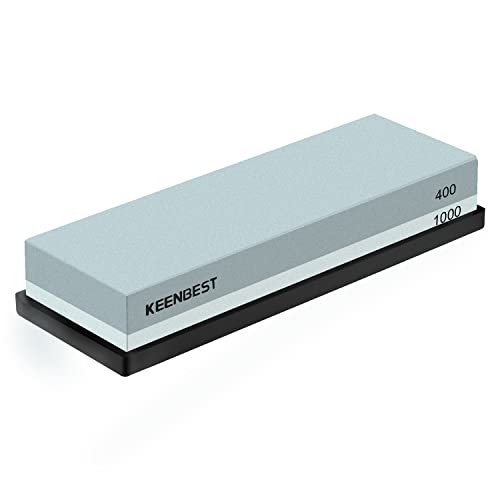
No oil needed, just put the stone into water for 10-15 minutes before using and they are ready to use. You can always adding water on it while sharpening, with water the lubricating effect of grinding will be great and helps you to save strength

Professional Whetstone: 2 whetstones have difference grit which are 400/1000 and 3000/8000. The grit is accurate. 4 sides grit are satisfy with any knife blade needs. 400/1000 grit is typically used to repair knives with chipped edges and sharpen dull knives. 3000/8000 grit used to refine the edge and provide extra fine finish/polish on your blades.

【Complete Knife Sharpening Stone Kit】You don't need to be a Pro to sharpen your blades, all you need is the right tools & technique. All the sharpening tools you need are here, one affordable set for you: 400/1000 & 3000/8000 grit whetstone; Coarse flattening stone; Non-Slip Bamboo base; Knife sharpening angle guide; Leather strop, a simple instruction manual about how to use and what does every component do.
Clean and Prep the Scissors for a Better Edge
Cleaning and preparing your scissors before sharpening ensure a better edge. Inspect them thoroughly for dirt, adhesive, dried paint, rust, or hair buildup, paying particular attention near the pivot, where debris often hides. Open and close the blades to reveal grime, then brush away loose particles with a stiff brush. If sticky residue remains, dab a cloth with a small amount of isopropyl alcohol—avoid soaking the blades. To remove rust, gently work fine steel wool over affected areas to keep the edge even. For hardened tape residue, a professional strength remover can be used to effectively lift the glue without dulling the blades. These steps are crucial as they create a clean surface for sharpening and prevent slips during the process. Following similar safety principles, if you need to ultimately discard old or damaged scissors, you should research local disposal rules for sharp items in your area. For those who also maintain kitchen tools, a quality knife set with block offers a balanced combination of performance and value for daily use. Additionally, to ensure your scissors match the high standards of top bread knives, consider their overall quality and performance after sharpening.
Once cleaned, dry the scissors completely with a cloth to prevent moisture from causing new rust. If the blades have been separated, reassemble them carefully. Apply a tiny drop of light oil to the pivot, then work the blades open and closed to distribute the oil evenly. Proper preparation not only protects your scissors but also ensures a smoother, more effective sharpening. Remember, neglecting this step can lead to uneven cuts, blade damage, and frustration.
Mark the Bevel: A Simple Trick for Sharpening Curved Scissors
Mark the bevel with a permanent marker before sharpening. Color the entire face from heel to tip to make contact points visible. This dark line acts as a contact map as you start. Light strokes with abrasive materials remove ink only where they actually touch the blade. A wheel is used for sharpening, establishing a baseline angle to guide the initial grind. Achieving this precision is easier when you start with a high-quality cutlery set that already maintains consistent factory bevels. For those seeking similar precision in their kitchen tools, affordable chef knives offer excellent quality and performance for sharpening practice. Unlike plastic cutting boards, which are often not recyclable and can harbor bacteria in deep grooves, sharpening stones remain a durable and reusable sharpening surface.
Check the bevel under bright light. You’ll see a strong reflection when the blade lays flat against the stone. Slightly rotate the blade to confirm the factory angle. If only part of the ink disappears, your angle is off—re-mark and make adjustments. The aim is to match the original geometry, not reshape it. This method works with any abrasive and ensures a simple, repeatable process. It allows you to sharpen the full curve evenly without guesswork.
Hold the Blade and Stone to Follow the Curve
To follow the curve, keep the blade moving in a smooth rocking arc so the stone stays aligned with the scissor’s belly. Let the contact point migrate along the curve instead of locking the blade in one position. Avoid forcing a straight pass, as this flattens the arc or misses the belly altogether. Short, controlled strokes help preserve the curve from start to finish. Using a high-quality board for support, like those featured on top charcuterie boards, provides a stable surface that prevents slipping during sharpening. Proper lubrication helps the stone glide evenly across the metal without clogging its pores. A wooden board is not recommended for this task because it can absorb moisture and warp after repeated exposure to water.
Maintain a consistent bevel angle as the blade tracks along the curve. Blade alignment is more important than speed; small angle adjustments are normal, but sudden shifts can ruin the edge. Use light pressure so the stone can naturally follow the curved profile without gouging. Keep the working section of the blade level relative to the stone throughout each stroke. Recheck the angle when working on tighter sections. Stable positioning is key to maintaining the bevel and preventing wobble. Supporting the blade near the working area reduces flex and helps keep the stroke precise. Using your fingers to drag the blade through the stone provides better control over the blade angle during the curve.

Total length: 270 mm (10.6 inches); width: 25 mm (0.984 inches); tapered dual-sided blade with flat 400 grit surface and curved 180 grit surface
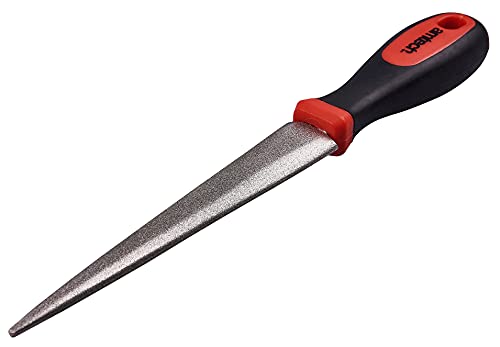
The Amtech 2-sided diamond sharpening file is ideal for sharpening a wide variety of items, such as scissors, knives and garden tools.

High Quality: The grinding stone is made of superior silicon carbide material and adopts high-temperature sintering technology, which has sharp grinding, high hardness and special wear resistance, and is suitable for any daily sharpening.
Step-By-Step: Sharpening From Heel to Tip Along the Arc
Begin at the heel or pivot end and work the stone in a smooth, continuous pass toward the tip, ensuring the blade’s natural curve guides each stroke. Before starting, visually trace the blade’s arc to match the existing bevel angle, maintaining the original geometry without creating a new bevel. Keep each pass consistent and centered, covering the entire cutting surface without stopping at the middle. Avoid short, jagged strokes that can cause uneven edges; instead, follow through the curve from heel to tip smoothly. Apply even pressure throughout each stroke to promote uniform sharpening. This consistent pressure helps prevent common beginner mistakes like creating uneven bevels or gouging the blade. Focus on removing only enough metal to restore sharpness, preserving the blade’s shape without flattening the curve. Similarly, in balanced culinary preparation, moderation supports health by avoiding over-processing ingredients. Repeatedly run the stone along the entire length of the edge, paying equal attention to both heel and tip to keep the edge line even and well-defined. Gradually bending from the back to the tip ensures consistent curvature restoration during the repair process.
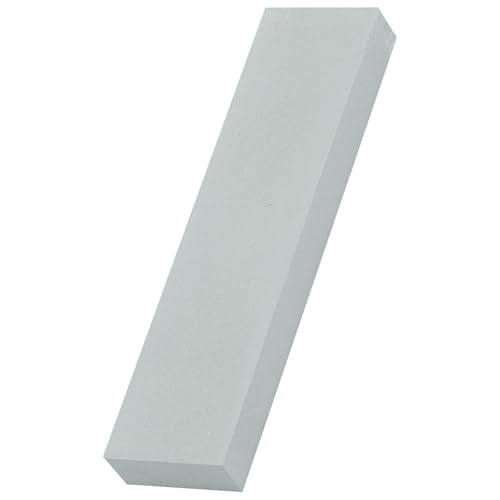
Package Included: You will get 1pcs gray 1000 grit knife sharpener stone crafted form diamond. The sturdy whetstone ensures effective sharpening for your kitchen pocket knife

【Professional Sharpening Applications】Ideal for scissors, knives, garden tools, and various household blades—a versatile sharpener for everyday maintenance needs.

High Quality: The grinding stone is made of superior silicon carbide material and adopts high-temperature sintering technology, which has sharp grinding, high hardness and special wear resistance, and is suitable for any daily sharpening.
Remove the Burr Without Ruining the Edge
Once the burr is raised from sharpening, you’ll remove it without damaging the edge by switching to your finest finishing surface—such as a 6000+ grit waterstone, a fine ceramic rod, or a leather strop. Use ultra-light, edge-trailing strokes; applying heavy force will flip the burr back onto the edge instead of removing it. Keep the blade aligned perfectly by laying the flat inner face flush against the stone—this prevents creating a new bevel. Remember, this is a cleanup step, not part of the sharpening process. Just two or three gentle passes per side on the finest abrasive are enough. If any burrs remain, stropping on leather or a newspaper stack can help remove them, as these tools are effective for removing microscopic burrs and enhancing edge quality. Never press hard during this step; pressing too hard will round the edge. The final cleanup should leave the edge smooth and free of any gritty feel, with no detectable burr. For stubborn burrs, a quick wipe with fractionated coconut oil helps lubricate the edge and prevent residue from interfering with the final finish. To keep your finishing stone effective for future use, regularly clean it with safe cleaning products that won’t damage the abrasive surface. Just as with plastic cutting boards, improper cleaning can degrade the tool’s surface over time, so always use gentle methods.

There are no plastic compounds

This is a good quality product

PERFECT FOR BEGINNERS – EASY AND SAFE TO USE: The IVDVGOE Premium Knife Sharpening Stone is designed for beginners and home cooks. This whetstone knife sharpener is easy to use, safe, and gives you confidence while sharpening your kitchen knives.
Check Your Work: Two Quick Tests for a Perfectly Sharp Blade
After removing the burr and smoothing the edge, the next step is to verify the blade is sharp. The paper-cut test is ideal since curved blades were originally designed for precision cuts. Use a piece of clean printer paper and cut with a smooth, controlled motion. A sharp blade will produce a clean edge from heel to tip without tearing. Be sure to test the tip separately because the distal end dulls fastest and is often overlooked. If the tip pinches or refuses to start cutting immediately, the blade hasn’t been sharpened evenly. Then, cut through the full length of the blade, focusing on the middle and front third. Look out for snagging, grinding, or pulling; these indicate roughness remaining on the edge. Finally, test on fine material like tissue. A clean slice without crushing confirms the blade is ready, helping you avoid the common mistake of quitting too soon.
Final Testing and Routine Maintenance to Preserve the Edge
Regular final testing and routine maintenance are essential to keep your scissors performing at their best. Always confirm that the blades open and close smoothly across their full travel, ensuring there’s no sticking or resistance. Check the pivot for free movement—no grinding or excess drag—as this indicates proper alignment. Visually inspect the edges along the entire length for burrs, nicks, or corrosion, and address these issues promptly to prevent further damage. Verify that the blades meet evenly through the entire arc; misalignment can cause uneven wear and reduce cutting precision. Make note of any abnormalities, such as uneven edges or stiffness, to identify patterns and plan repairs.
After each client, wipe the blades with a lint-free cloth to remove hair, residue, and debris. Avoid soaking the scissors; instead, dry them immediately after sanitizing to prevent rust. Apply a single drop of scissor oil at the pivot point and open and close the blades to distribute the oil evenly. Wipe away any excess oil to maintain cleanliness. Regularly check tension—loose blades can cause micro-chipping or uneven cuts—and tighten if necessary. Store your scissors in a dry, separate space from other tools to prevent nicks and damage. Clean the blades thoroughly after every use, oil weekly, and inspect for burrs or nicks weekly. Sharpen the blades based on your steel’s service life rather than a fixed schedule, as consistent care extends the longevity of your scissors and reduces the frequency of sharpening.

✅ PREMIUM QUALITY MATERIALS: Made of high quality stainless steel promising durability, long life span, and anti corrosion properties. Perfectly calibrated to ensure that they are easy to squeeze and maneuver. Easy to clean and sterilse for repetitive use.

✅ PREMIUM QUALITY: Excellent for cutting suture, tissue, and other general uses in the Operation and other universal purposes. Constructed of 420 type stainless steel with Superior Craftsmanship. Sharp and durable. Premium Quality Grade Stainless steel for Anti-stick, Anti-rust, high quality for long service life, comfortable to hold and easy to operate.

Spring loaded tension for an "always ready" open position