If you’re struggling to get a clean, precise cut with your fillet knife, sharpening might be the answer.
Properly honing your blade can turn it from dull and ragged to razor sharp, making your cuts smoother and safer.
In this guide, you’ll learn the step-by-step process to achieve a razor-sharp edge, from setting the right angle to polishing your blade.
Keep reading to find out how to keep your fillet knife performing at its best.
Why Sharpening Your Fillet Knife Correctly Matters
A sharp fillet knife significantly enhances your safety and control during use. When the blade is properly sharpened, you can cut with less force, allowing it to glide smoothly through flesh rather than pushing against bones and skin. This reduces the risk of slipping and accidental cuts. Dull blades require more pressure, increasing your chances of losing control and causing dangerous, uncontrolled cuts. Regular sharpening ensures your edge cuts cleanly, following the fish’s natural curves with precision. This precision is especially important when working around delicate ribs and skin, as cleaner cuts help preserve meat structure and minimize waste. Understanding the differences between ceramic knives vs metal helps you choose a blade material that best suits your sharpening needs and cutting style. To maintain that delicate edge, you should also consider placing your knife on a cutting board surface that won’t prematurely dull the blade. For added convenience, you can keep your sharpening tools within easy reach by storing them near your primary prep station to encourage a consistent maintenance routine.
Keeping your fillet knife sharp also speeds up the process and reduces hand fatigue, making your fish prep more efficient. Instead of fighting the blade, you work smoothly and confidently, achieving restaurant-quality results. Don’t wait until your blade becomes severely dull; routine sharpening not only prolongs the life of your knife but also keeps every cut effortless and safe.
Choose the Best Sharpening Angle for Fillet Knives
The ideal sharpening angle for your fillet knife is typically between 12 and 22 degrees per side, depending on the knife’s flexibility and intended task. For delicate fish filleting, a sharper edge around 12 to 15 degrees offers precision but may sacrifice some durability. A balance between sharpness and edge stability is achieved at 15 to 20 degrees, suitable for most general tasks. When dealing with tougher skin or bones, increasing the angle to 18 to 22 degrees enhances edge stability and durability. If your blade is very flexible, a wider angle—around 20 to 25 degrees—helps prevent chipping under stress. Always consider the steel type: softer steels often need larger angles to maintain their edge, while harder steels can be sharpened more sharply without chipping. Adjust your sharpening angle based on the specific task, blade flexibility, and steel type for optimal performance. For instance, consult recommended degree ranges for each blade style to match your specific knife’s design and usage. For skinning larger game like deer, a slightly wider angle of 20 to 22 degrees provides the edge stability needed to handle tougher connective tissue without rolling the blade. Extending the lifespan of your whetstone through proper flattening and cleaning will ensure consistent sharpening results for every fillet knife angle you use.

15° Whetstone Angle Guide: Helps keep a steady sharpening angle on a whetstone, so beginners can build a more repeatable stroke for kitchen knives and chef knives.

CONSISTENT FIXED ANGLE — Attaches securely to your blade to maintain a steady, repeatable angle against the whetstone, helping you avoid the uneven edges that come from freehand sharpening.

𝐀𝐜𝐡𝐢𝐞𝐯𝐞 𝐫𝐚𝐳𝐨𝐫-𝐬𝐡𝐚𝐫𝐩 𝐞𝐝𝐠𝐞𝐬 𝐞𝐯𝐞𝐫𝐲 𝐭𝐢𝐦𝐞: SHARPAL 194H is the perfect tool to ensure that your knives, chisels and Plane Iron Blades are always sharpened at the correct angle, resulting in sharper edges that last longer.
How to Set the Angle When You Sharpen a Fillet Knife
To set the correct angle when sharpening a fillet knife, start by raising the spine until the bevel aligns with your target angle. For a 17-degree edge, raising the spine about the thickness of two credit cards off the stone typically works. Keep the blade straight from heel to tip so that the entire edge contacts the stone evenly.
Blade flexibility requires maintaining a consistent angle rather than applying heavy pressure. Use light and controlled strokes, especially near the tip, which tends to rock during sharpening. Avoid common beginner mistakes such as rocking the blade or applying too much pressure, which can create a weak edge. Perform short sets of 10 to 15 strokes per side and check for a burr, indicating you’ve reached the apex at your chosen angle. Just as a high-end charcuterie board often reflects the underlying quality of its materials and design, your knife’s final edge quality depends on the precision of your setup and strokes. Flip the knife and repeat on the other side, keeping the same angle throughout the process. Avoid rushing; inconsistencies in angle can create a weak edge or produce an unwanted double bevel. If your fillet knife already has a factory bevel, aim to match its angle during sharpening. For a durable result, also ensure the stone surface is flat and well-oiled, as a clean, long-lasting edge relies on stable contact between blade and abrasive.
How to Match Grit to Your Knife’s Condition
Matching grit to your knife’s condition depends on assessing the damage and dullness accurately. For a chipped or heavily neglected edge, start with a coarse grit between 200 and 400. This range effectively repairs the damage by removing damaged steel and reshaping the edge. Focus on abrasive compatibility with your repair needs, not on achieving a polished finish at this stage. If the edge is dull but still intact, skip the coarse grits and move directly to 400–600 grit. This helps restore a sharp, working edge without excessive steel removal that could weaken the blade. For regular sharpening, a grit range of 800 to 1200 is reliable and efficient. To refine the edge further, use a progression of finer grits, such as 1000 to 3000, for a toothy finish suitable for gripping soft-skinned fish or similar tasks. For a polished, glide-through feel on proteins and delicate foods, advance up to 6000 grit. Always match your final grit to your preferred cutting behavior—whether you want a bit of bite or a smooth, polished cut. Remember, smaller increments between grits make the progression smoother and more controlled. Properly maintained tools also benefit from regular conditioning, just as cutting boards require food safe mineral oil to prevent drying and cracking. For those prioritizing long-term value, investing in high-quality cutlery sets reduces the frequency of repairs and makes grit progression more consistent. Choosing a white knife set ensures you start with uniformly tempered blades that hold an edge longer.
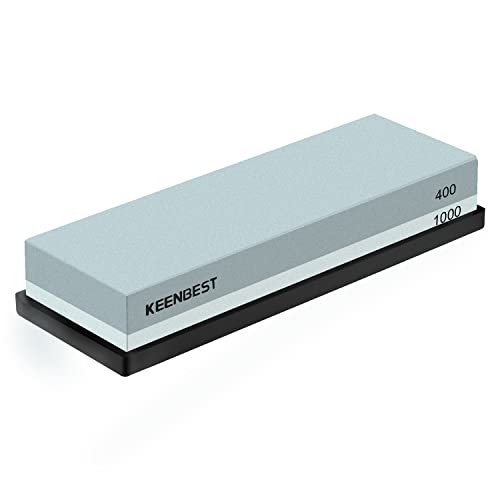
No oil needed, just put the stone into water for 10-15 minutes before using and they are ready to use. You can always adding water on it while sharpening, with water the lubricating effect of grinding will be great and helps you to save strength
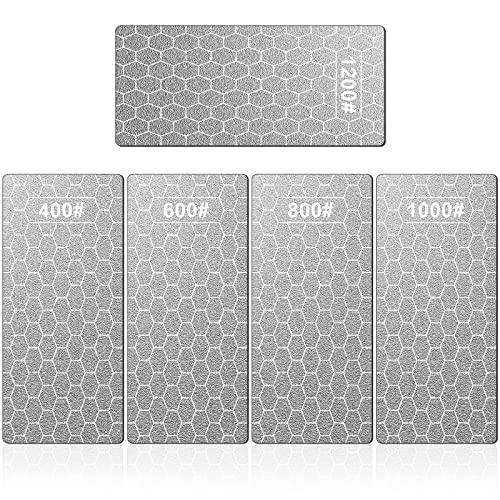
Unique Honeycomb Design:The sharpening stone set with unique honeycomb design ensures that the dust generated during the grinding process will not affect the sharpening. The diamond sharpening stone has a non-slip base to ensure that it will not slip during use and easily tackle both coarse and fine sharpening jobs.

5 pieces sharpening plates,made of durable diamond material
Step-By-Step: Sharpening From Coarse to Fine
Start sharpening with a coarse grit around 200–400 if your blade requires reshaping or shows visible wear. This initial step helps restore the blade’s basic form before fine-tuning the edge. Position your stone on a stable, non-slip surface and apply lubrication to reduce friction. Use strong lighting to clearly see your progress and maintain a consistent 17–20 degree angle throughout. Keep your heel-to-tip passes gentle and steady, applying light, even pressure to avoid dulling or damaging the edge.
Flip the blade and repeat the same stroke pattern to ensure an even, symmetrical edge. Progress to a medium grit for intermediate refinement, then switch to a fine grit in the 3000–8000 range for polishing and a sharper, smoother edge. As you move to finer abrasives, decrease the pressure to focus on polishing rather than metal removal. Consistently keep the angle and stroke path uniform throughout each stage. Using sharpening accessories like a stone holder or an angle guide can help maintain control and precision across the entire process.

VERSATILE FUNCTIONALITY: For sharpening carpentry tools, garden equipment and kitchen utensils

【Complete Knife Sharpening Stone Kit】You don't need to be a Pro to sharpen your blades, all you need is the right tools & technique. All the sharpening tools you need are here, one affordable set for you: 400/1000 & 3000/8000 grit whetstone; Coarse flattening stone; Non-Slip Bamboo base; Knife sharpening angle guide; Leather strop, a simple instruction manual about how to use and what does every component do.
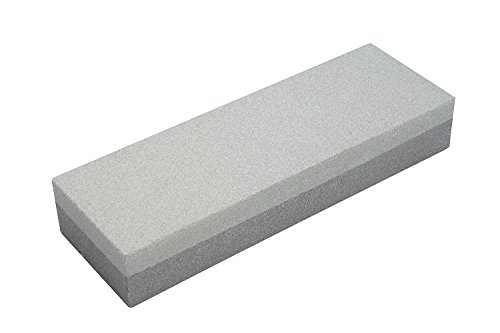
The Bora 6-inch aluminum oxide sharpening stone is a 2 sided stone: one coarse grit and one fine grit
Spot and Remove the Burr: Don’t Skip This Step
To effectively spot and remove the burr, use alternating light passes on both sides of the blade. Heavy grinding can cause the burr to re-form or damage the edge, so gentle strokes are key. Finish by applying edge-trailing strokes on leather to smooth out the edge. You can also lightly drag the blade through soft wood or folded newspaper to further refine the edge. For optimal hand protection during this process, consider whether leather gloves provide adequate cut resistance. As you approach the end, reduce pressure to avoid flipping the burr back onto the edge rather than removing it. A properly finished edge will feel smooth on both sides, without hooks or ragged areas. Skipping this step can result in a dull or uneven finish, impacting cutting performance and safety. For a knife that will hold this fine edge longer, remember that forged knives generally offer superior edge retention compared to stamped alternatives. This final leather work should be done at a slightly heavier angle to tear off any residual burr for a polished edge. To maintain your tools long-term, regularly applying a protective bamboo oil can prevent the handle from drying out and cracking.
Honing vs. Sharpening: When to Do What
Honing should be performed regularly—preferably before each use—while sharpening only when honing no longer maintains the blade’s effectiveness. Honing realigns a rolled or misaligned edge without removing metal, making it ideal for quick, routine maintenance. You’ll want to use a ceramic rod or similar honing tool to restore the blade’s crispness when it still cuts but feels slightly less sharp. This step is especially useful for thin, flexible fillet knives that respond quickly to realignment. Just as with cherry pitters efficiently remove fruit pits with a simple push-and-pierce motion, a honing rod uses a similar mechanical principle to realign the blade edge. Just as with bamboo cutting boards, using food-grade mineral oil helps protect the blade’s surface from moisture and corrosion after sharpening. Sharpen only when honing no longer improves performance—typically indicated by increased tearing, nicks, or difficulty slicing cleanly. Sharpening involves grinding metal to create a new cutting edge, which removes material and should be reserved for more severe damage or dullness. If your knife still drags after honing, it’s time to sharpen. Avoid sharpening too often, as over-sharpening can reduce your blade’s lifespan. Remember, hone often to prolong the interval between sharpenings, saving your blade’s metal and maintaining its finely honed edge. Properly oiling your bamboo cutting board with food-grade mineral oil can also prevent warping and cracking, extending its useful life.

HONE A KEEN EDGE BETWEEN SHARPENINGS The ceramic rod refines and realigns your blade so kitchen knives stay slicing-sharp longer, giving home cooks a quick edge tune-up before every meal
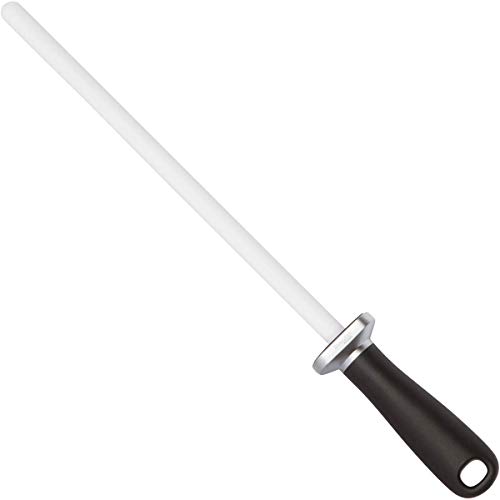
HRC 68 Ceramic Alumina – Harder Than Steel: Ceramic alumina ranks just below diamond on the hardness scale at HRC 68, making this rod harder than steel, rust-resistant, and built for lasting performance. The 1000 grit surface gently realigns your blade edge with each stroke — restoring sharpness without stripping excessive metal — so knives stay sharper longer between full sharpenings.

KITCHEN KNIFE SHARPENER FOR ROUTINE CARE: Keep frequently used knives ready for everyday prep. This honing rod helps maintain and refresh the cutting edge between more intensive sharpening sessions, making regular knife care quick and straightforward.
5 Mistakes That Ruin a Flexible Fillet Blade
The five common mistakes that can ruin a flexible fillet blade all relate to how you handle pressure, angle, and finishing. First, raising the spine too high creates a steep bevel that weakens the thin steel. This results in inconsistent geometry from heel to tip, reducing the blade’s effectiveness. Next, applying too much pressure causes the blade to flex and deflect away from the stone, especially at the tip. Using light, controlled strokes helps maintain a steady contact point. Ignoring blade flex mid-stroke can also lead to uneven sharpening; it’s better to sharpen in short, deliberate sections. Over-polishing to a mirror finish is another mistake—fine micro-serrations are more effective for biting into fish skin. Lastly, angle drift—losing the correct angle during sharpening—creates a wavy bevel that feels dull. To preserve the blade’s integrity, stay locked into your chosen angle throughout the process. These five mistakes are easily avoidable once you’re aware of them. Because the blade’s soft metal raises a burr quickly, you must use careful support during every pass to maintain a clean edge. Using a cutting board that is too hard or uneven can also cause the thin edge to chip or dull prematurely. Even with proper technique, neglecting a realistic maintenance schedule leads to a blade that requires much more effort to restore.
How to Keep That Razor Edge Longer
Keeping that razor-sharp edge longer relies on smart daily habits. After each use, hand-wash your knife with mild soap and warm water, then dry it thoroughly. Pay special attention to the area where the blade meets the handle, as remaining moisture can weaken the handle over time. Never put your knife in a dishwasher.
Hone regularly with a ceramic rod or fine strop. Light, consistent passes help realign the edge without removing metal, preserving blade flexibility. Use soft cutting surfaces like wood or plastic boards; avoid glass or stone, as these hard surfaces can dull or chip the bevel.
Store your knife in a dry place, either in a sheath or on a magnetic strip, separated from other utensils to prevent accidental dulling. During off-season storage, apply a thin coating of oil to protect the metal. Maintain a consistent sharpening angle, typically between 10 and 20 degrees, and only sharpen when honing no longer restores the edge. These habits extend the time between full sharpenings and keep your razor edge ready for precise cuts.